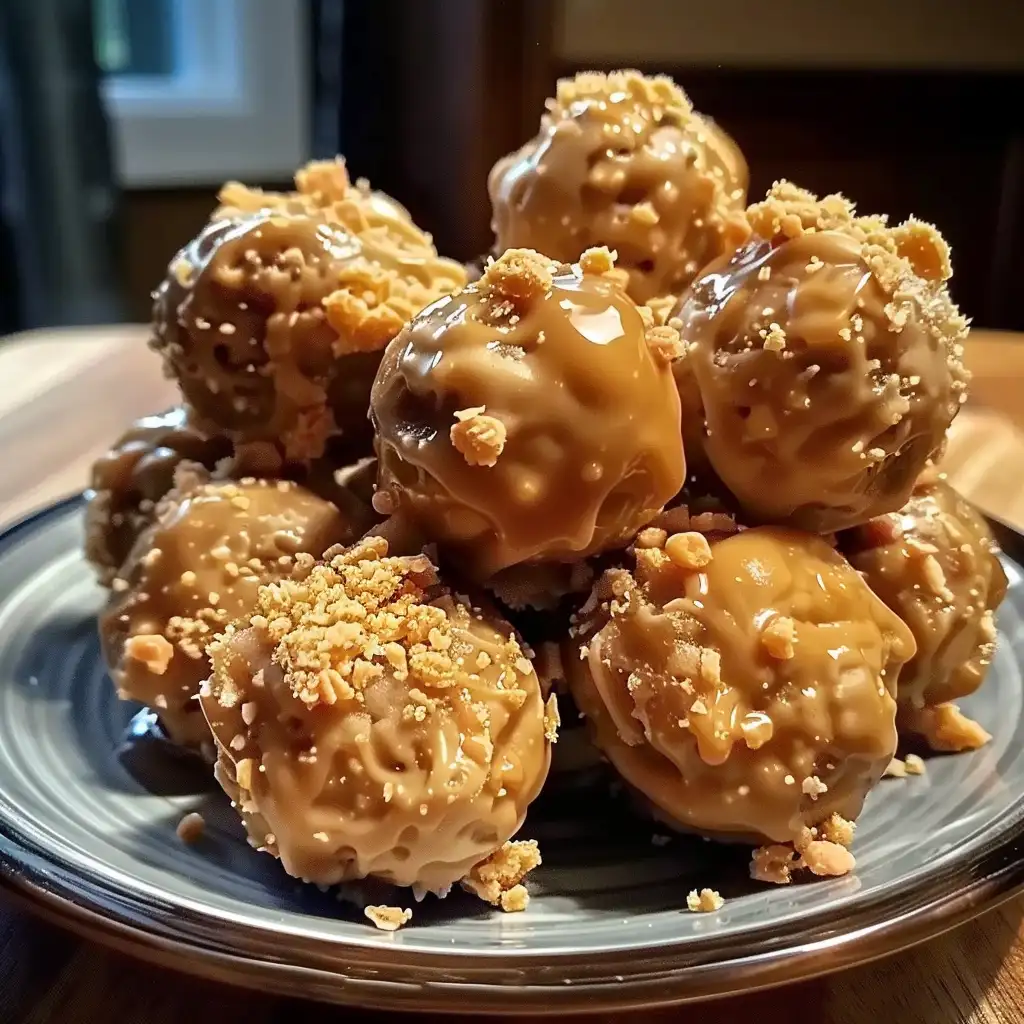
These Butterfinger Balls are an irresistible treat that combines the classic flavors of peanut butter and chocolate with the crunch of crushed vanilla wafers. Perfect for parties, holiday trays, or a quick sweet fix, they’re easy to make and even easier to enjoy!
Why You’ll Love Butterfinger Balls
- No-Bake Delight: No oven required—just mix, chill, and dip!
- Rich and Creamy Texture: The combination of peanut butter and chocolate creates a smooth, indulgent bite.
- Kid-Friendly: Fun to make and eat with the whole family.
- Perfect for Sharing: A batch makes 24 balls, ideal for gatherings.
Ingredients Overview
- Vanilla Wafers (16 oz): Adds crunch and a subtle vanilla flavor.
- Powdered Sugar (16 oz): Sweetens and binds the mixture.
- Creamy Peanut Butter (1 cup): Provides richness and flavor.
- Melted Butter (1 cup): Ensures the mixture is moist and easy to shape.
- Chocolate Chips (2 cups): Melts into a smooth coating for the perfect finish.
Step-by-Step Instructions
1. Prepare the Mixture
- In a large mixing bowl, combine the crushed vanilla wafers, powdered sugar, creamy peanut butter, and melted butter.
- Mix thoroughly until all ingredients are fully incorporated. The mixture should have a firm, dough-like consistency.
2. Shape the Balls
- Roll the mixture into small, bite-sized balls, about 1 inch in diameter.
- Place them on a baking sheet lined with wax paper to prevent sticking.
3. Chill the Balls
- Refrigerate the balls for about 30 minutes, or until they are firm and easy to handle.
4. Melt the Chocolate
- In a microwave-safe bowl, melt the chocolate chips in 30-second intervals, stirring between each interval until smooth and fully melted.
5. Coat the Balls
- Using a fork or toothpick, dip each ball into the melted chocolate, ensuring it’s evenly coated.
- Return the coated balls to the wax paper-lined baking sheet.
6. Set the Chocolate
- Allow the chocolate to set completely. You can speed up this process by placing the tray back in the refrigerator for 15–20 minutes.
7. Serve and Enjoy
- Once the chocolate is firm, your Butterfinger Balls are ready to serve. Store any leftovers in an airtight container in the fridge for up to a week.
Tips for Success
- Crush Wafers Evenly: Use a food processor for finely crushed wafers, or place them in a sealed bag and crush with a rolling pin.
- Consistency Matters: If the mixture is too crumbly, add a bit more peanut butter or melted butter to help bind it.
- Chocolate Dipping Hack: Use a fork to dip the balls, letting the excess chocolate drip off before placing them back on the wax paper.
- Decorate for Fun: Before the chocolate sets, sprinkle the tops with crushed vanilla wafers, sprinkles, or a drizzle of white chocolate for extra flair.
Variations to Try
- Crunchy Peanut Butter Balls: Use crunchy peanut butter for added texture.
- Add Candy Coating: Swap the chocolate chips for colorful candy melts to match seasonal themes.
- Peanut Butter Lovers: Add a crushed Butterfinger candy bar to the mixture for extra flavor and crunch.
- Dairy-Free Option: Use dairy-free chocolate chips and plant-based butter substitutes.
Perfect Pairings
- Hot Drinks: Pair with coffee, hot cocoa, or tea for a cozy treat.
- Ice Cream: Crumble Butterfinger Balls over vanilla ice cream for a decadent dessert.
- Party Platters: Add these to a dessert tray alongside cookies, brownies, or truffles for variety.
Frequently Asked Questions
1. Can I freeze Butterfinger Balls?
Yes! Freeze them in an airtight container for up to 2 months. Thaw in the fridge before serving.
2. What can I use instead of vanilla wafers?
Graham crackers or digestive biscuits can be a great substitute.
3. How do I prevent the chocolate from cracking?
Ensure the balls aren’t too cold before dipping, as the temperature contrast can cause the chocolate to crack.
Why These Butterfinger Balls Are a Must-Make
Butterfinger Balls are the ultimate combination of simplicity and indulgence. Whether you’re preparing for a holiday celebration, a potluck, or a casual weeknight dessert, this recipe will win over everyone who takes a bite.
Get ready to savor the perfect balance of peanut butter, chocolate, and crunch in every delicious morsel!