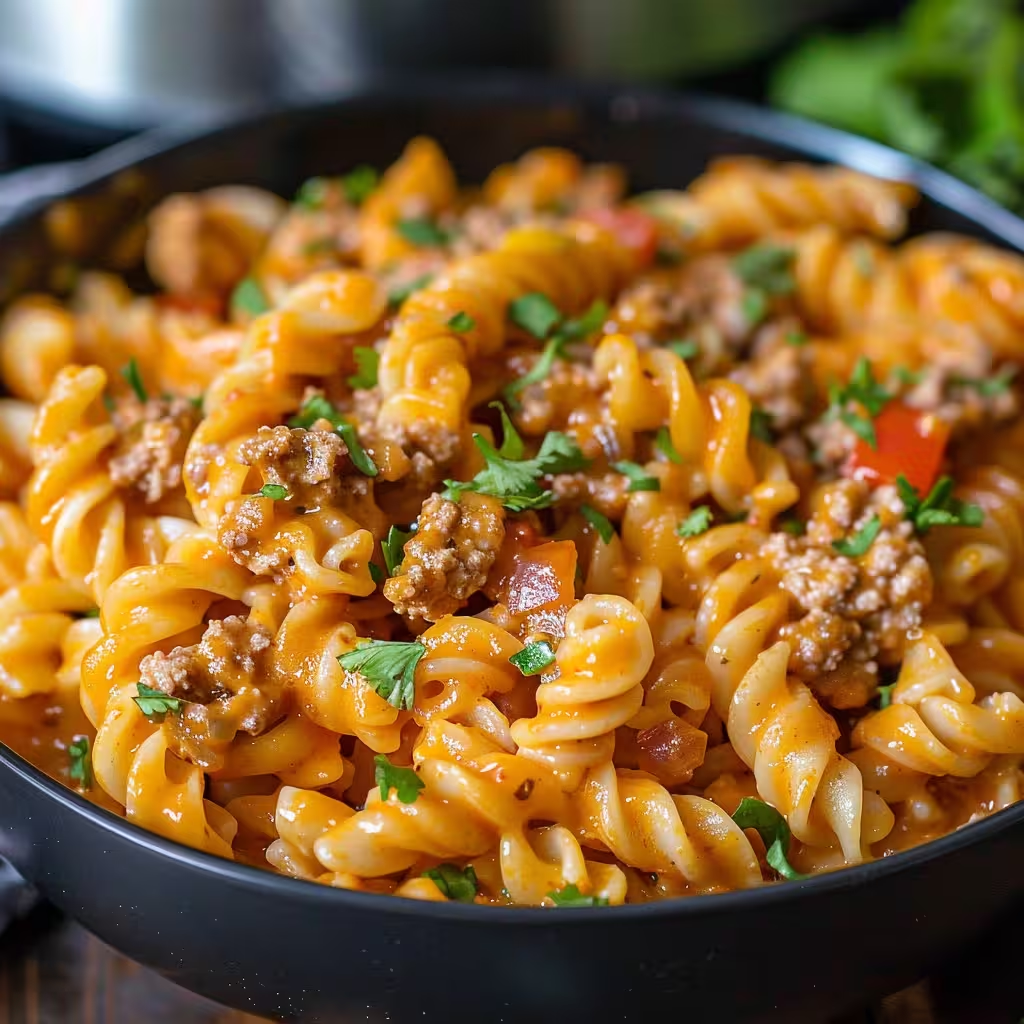
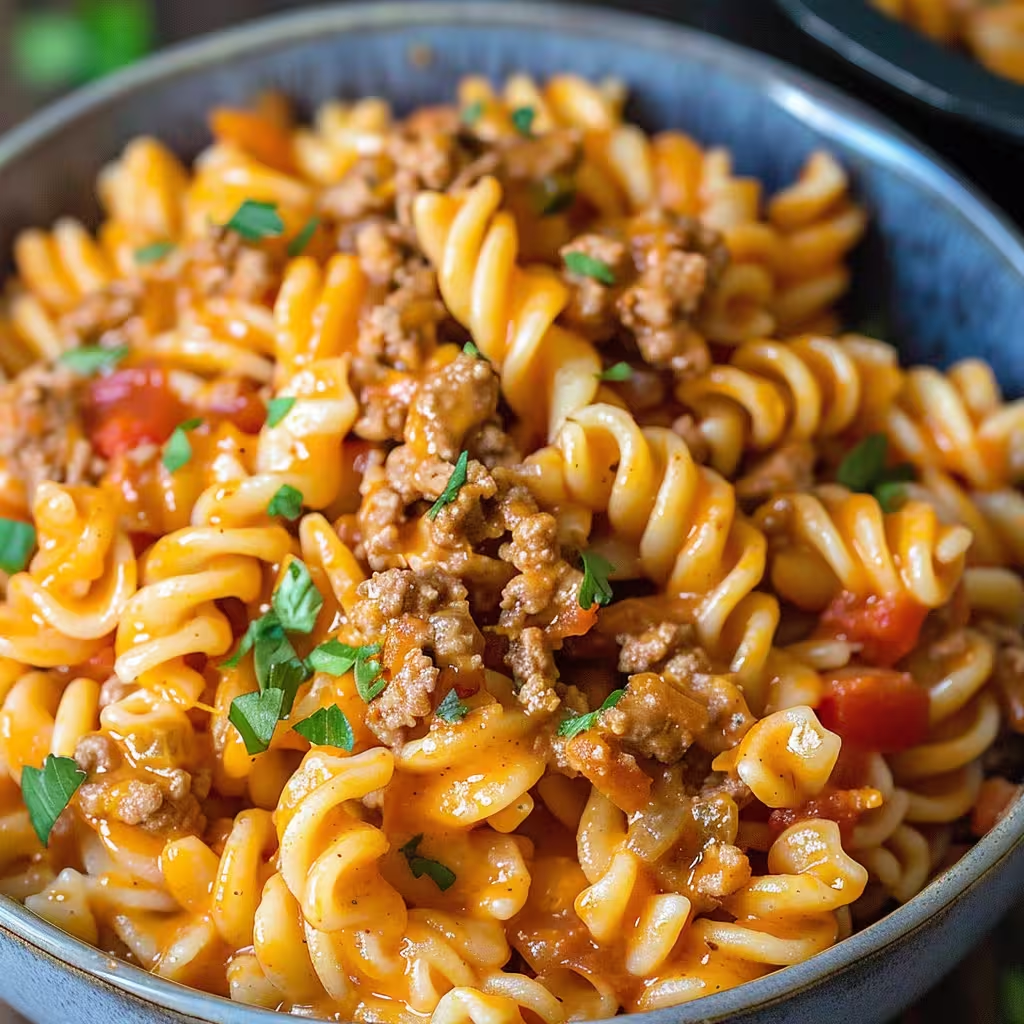
When busy weeknights demand a dinner solution that’s both satisfying and quick, this Instant Pot Taco Pasta delivers everything your family craves in just one pot. Combining the beloved flavors of tacos with the comfort of creamy pasta, this recipe transforms simple ingredients into a restaurant-quality meal that’s ready in under 30 minutes from start to finish.
This pressure cooker pasta recipe eliminates the hassle of multiple pots and pans while creating a dish that’s rich, cheesy, and packed with Mexican-inspired flavors. Whether you’re feeding hungry teenagers, hosting a casual dinner party, or meal prepping for the week ahead, this Instant Pot taco pasta proves that convenience doesn’t mean compromising on taste.
Why This Instant Pot Pasta Recipe Works Every Time
The magic of this recipe lies in the perfectly balanced cooking times and liquid ratios that ensure tender pasta without any mushiness. By layering the ingredients strategically and using the pressure cooker’s steam function, every component cooks to perfection simultaneously. The ground beef becomes perfectly seasoned, the pasta achieves ideal texture, and the cheese melts into a creamy sauce that coats every shell.
Unlike stovetop versions that require constant stirring and multiple steps, this one-pot wonder lets your Instant Pot do all the work while you focus on other dinner preparations or simply relax after a long day.
Essential Ingredients for Perfect Taco Pasta
Protein Base:
- 1 pound ground beef (85-90% lean) – The ideal fat content for flavor without excess grease
- 1 yellow onion, diced – Adds sweetness and depth to the meat mixture
- 2 cloves garlic, minced – Essential aromatic foundation
Seasoning and Flavor:
- 1 tablespoon taco seasoning – The flavor backbone that gives this dish its Mexican identity
- Salt and ground black pepper – To taste, for balanced seasoning
Liquid Components:
- 1 8-ounce can tomato sauce – Provides richness and helps create the sauce base
- 1 cup mild salsa – Adds texture, flavor, and authentic taco taste
- 3 cups beef stock – The cooking liquid that infuses the pasta with savory flavor
Pasta and Dairy:
- 12 ounces uncooked medium pasta shells – The perfect shape for holding all that cheesy goodness
- 6 ounces cheddar cheese, shredded – Creates the creamy, indulgent finish
- ½ cup heavy cream – Adds richness and helps create a smooth sauce
- 2 tablespoons fresh cilantro, chopped – Fresh garnish that brightens the entire dish
Step-by-Step Instant Pot Instructions
Step 1: Brown the Beef
Press the SAUTE function on your Instant Pot and allow it to heat up. Add the ground beef and break it apart with a wooden spoon or spatula as it cooks. Continue cooking for about 3 minutes until the beef is browned and no longer pink. The key here is to break it into small, uniform pieces that will distribute evenly throughout the pasta.
Step 2: Add Aromatics
Add the diced onion and minced garlic directly to the pot with the browned beef. Continue cooking for 2 minutes until the onion begins to soften and the garlic becomes fragrant. This step builds the flavor foundation for the entire dish. Once the aromatics are cooked, turn off the SAUTE function to prevent burning.
Step 3: Build the Flavor Base
Season the beef mixture with taco seasoning, salt, and pepper, stirring to distribute evenly. Add the tomato sauce, salsa, and beef stock, stirring everything together to create a cohesive liquid base. This combination provides both the cooking liquid for the pasta and the sauce that will coat the final dish.
Step 4: Add the Pasta
Place the uncooked pasta shells directly over the beef mixture. Using a spatula, gently push the pasta down into the liquid until it’s completely submerged. If needed, add a small amount of water to ensure all pasta pieces are covered – this prevents uneven cooking and ensures every shell reaches perfect tenderness.
Step 5: Pressure Cook
Secure the Instant Pot lid and set the valve to SEALING position. Select PRESSURE COOK or MANUAL setting on high pressure for exactly 4 minutes. The Instant Pot will take several minutes to come to pressure before the actual cooking time begins. This precise timing ensures perfectly cooked pasta without any mushy texture.
Step 6: Quick Release and Finish
When the cooking cycle completes, immediately perform a quick steam release by carefully turning the valve to VENTING. Once all steam has been released and the float valve drops, remove the lid and give the pasta a good stir to combine all ingredients evenly.
Step 7: Create the Creamy Finish
Stir in the heavy cream first, followed by the shredded cheddar cheese. Continue stirring until the cheese completely melts and creates a smooth, creamy sauce that coats every piece of pasta. The residual heat from the cooking process will be sufficient to melt the cheese perfectly without additional cooking time.
Expert Tips for Instant Pot Success
Choose the Right Pasta Shape: Medium pasta shells work perfectly because their shape holds the meat and cheese mixture beautifully. Penne, rotini, or rigatoni are excellent alternatives if shells aren’t available.
Don’t Skip the Sauté Step: Browning the beef first develops crucial flavor through the Maillard reaction. This extra step makes a significant difference in the final taste.
Liquid Ratios Matter: The combination of beef stock, tomato sauce, and salsa provides exactly the right amount of liquid for proper pasta cooking. Don’t alter these ratios without adjusting cooking times.
Quick Release is Critical: Natural pressure release will overcook the pasta, resulting in mushy texture. Always use quick release for pasta dishes.
Cheese Addition Timing: Add cheese only after cooking is complete and the pot is off heat. This prevents the cheese from breaking or becoming grainy.
Nutritional Information and Dietary Modifications
This hearty meal provides approximately 450 calories per serving when divided into 6 portions. It’s rich in protein from the ground beef and provides complex carbohydrates from the pasta, making it a well-balanced comfort meal.
Dietary Adaptations:
- Lower Fat Version: Use 93/7 lean ground beef and substitute Greek yogurt for heavy cream
- Gluten-Free Option: Replace regular pasta with gluten-free shells and ensure taco seasoning is certified gluten-free
- Dairy-Free Alternative: Use cashew cream instead of heavy cream and dairy-free cheese shreds
- Vegetarian Version: Replace ground beef with plant-based ground meat or extra black beans
Creative Variations and Add-Ins
Vegetable Boost:
- Bell Peppers: Add diced peppers with the onions for extra color and nutrition
- Corn: Stir in frozen corn kernels during the final mixing step
- Black Beans: Add a drained can of black beans for extra protein and fiber
- Jalapeños: Include diced jalapeños for additional heat and authentic Mexican flavor
Cheese Variations:
- Mexican Cheese Blend: Use a combination of cheddar, Monterey Jack, and queso blanco
- Pepper Jack: Add spicy kick with pepper jack cheese
- Cream Cheese: Incorporate 4 oz cream cheese for extra richness
Spice Level Adjustments:
- Mild Version: Use mild salsa and reduce taco seasoning slightly
- Medium Heat: Add diced green chiles or chipotle powder
- Extra Spicy: Include cayenne pepper and use hot salsa
Serving Suggestions and Toppings
This taco pasta is delicious on its own but becomes even more special with thoughtful toppings and sides:
Fresh Toppings:
- Diced avocado or guacamole
- Sour cream or Greek yogurt
- Fresh cilantro leaves
- Sliced green onions
- Diced tomatoes
- Pickled jalapeños
Side Dish Pairings:
- Mexican street corn (elote)
- Simple green salad with lime vinaigrette
- Warm tortillas or cornbread
- Roasted vegetables with cumin and lime
Storage and Meal Prep Guidelines
This Instant Pot taco pasta stores exceptionally well, making it perfect for meal planning and leftovers. Store cooled pasta in airtight containers in the refrigerator for up to 4 days or freeze portions for up to 3 months.
Reheating Instructions:
- Microwave: Heat individual portions for 1-2 minutes, stirring halfway through
- Stovetop: Reheat gently over medium-low heat, adding a splash of milk or broth if needed
- Instant Pot: Use the SAUTE function with a small amount of liquid to gently reheat larger portions
For best results when freezing, slightly undercook the pasta initially, as it will continue to soften during the reheating process.
Troubleshooting Common Issues
Pasta Too Firm: If pasta isn’t tender enough after pressure cooking, use the SAUTE function for 2-3 additional minutes with extra liquid if needed.
Too Much Liquid: If the final dish seems soupy, use the SAUTE function with the lid off to reduce excess liquid while stirring frequently.
Cheese Won’t Melt: Ensure the pasta is still hot when adding cheese. If needed, return to SAUTE mode briefly while stirring continuously.
Burn Notice: If your Instant Pot displays a burn notice, ensure you’re deglazing properly after browning the beef and that pasta is fully submerged in liquid.
Cost-Effective Family Meal Planning
This recipe serves 6 generously for approximately $12-15 total, making it an economical choice for families. The cost per serving is significantly lower than restaurant equivalents while providing superior nutrition and the ability to customize ingredients.
Consider doubling the recipe for larger families or to ensure leftovers for lunch the next day. The ingredients are pantry-friendly and often available at bulk prices, making this an excellent go-to recipe for budget-conscious meal planning.
The Science Behind Perfect Pressure Cooker Pasta
Understanding how pressure cooking affects pasta helps ensure consistent results. The high-pressure environment allows pasta to cook evenly while absorbing flavors from the surrounding liquid. The 4-minute cooking time accounts for the pasta’s thickness and the liquid absorption rate, while the quick release prevents overcooking.
The layering technique – placing pasta on top rather than mixing it in – ensures even cooking and prevents sticking to the bottom of the pot, which could trigger the burn sensor.
Why This Recipe Beats Store-Bought Alternatives
Homemade taco pasta offers superior flavor control, fresher ingredients, and significantly better nutrition compared to boxed meal kits or frozen dinners. You control the sodium content, can use higher-quality meat, and avoid preservatives and artificial flavors common in processed alternatives.
The active cooking time is minimal – most of the 30-minute total time is hands-off pressure cooking, making this nearly as convenient as processed options but infinitely more satisfying and nutritious.
Conclusion: Your New Weeknight Hero
This Instant Pot Taco Pasta recipe solves the eternal weeknight dinner dilemma by combining speed, convenience, and incredible flavor in one satisfying dish. The pressure cooker method ensures perfectly cooked pasta while the Mexican-inspired seasonings create a meal that feels both familiar and exciting.
Whether you’re new to pressure cooking or an Instant Pot veteran looking for fresh recipe ideas, this taco pasta delivers consistent results with minimal effort. The one-pot cooking method means easy cleanup, while the customizable nature allows you to adapt the recipe to your family’s preferences and dietary needs.
Make this recipe once, and it’s guaranteed to become a regular rotation dinner that everyone requests. The combination of comfort food satisfaction and practical weeknight convenience makes it the perfect addition to any busy family’s meal planning arsenal.
Related posts:
 The Ultimate Oyster Sauce Beef Onion Stir-Fry: A 20-Minute Weeknight Dinner Solution
 Weeknight Chicken Cordon Bleu: Transform Your Dinner Routine with This 30-Minute Restaurant Classic
 Overnight Focaccia
 Chili Cornbread Bowl! Hearty chili meets cornbread perfection
 All-in-One Sheet Pan Lasagna
 The Perfect Baked Potato: Crispy Outside, Fluffy Inside
 Air Fryer Parmesan Chicken Tenders
 Crispy Cheesy Hash Browns