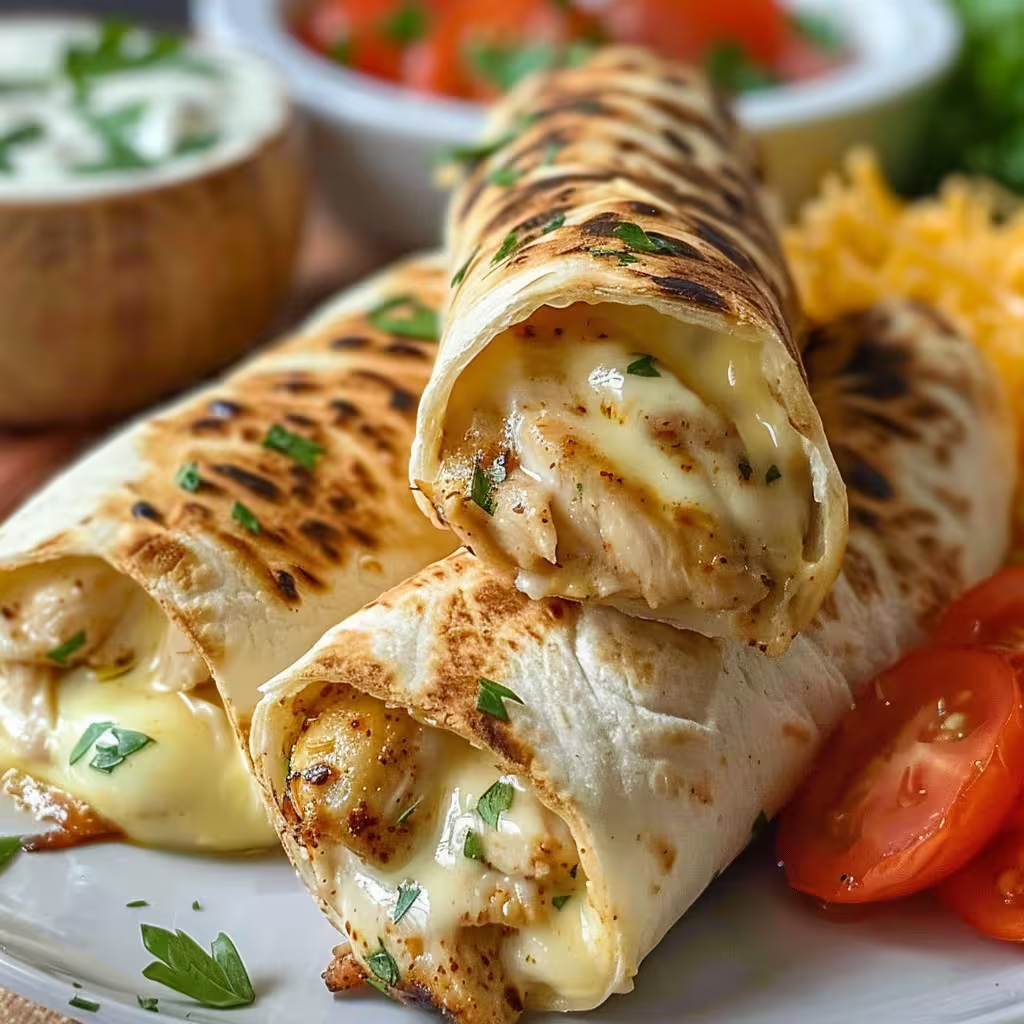
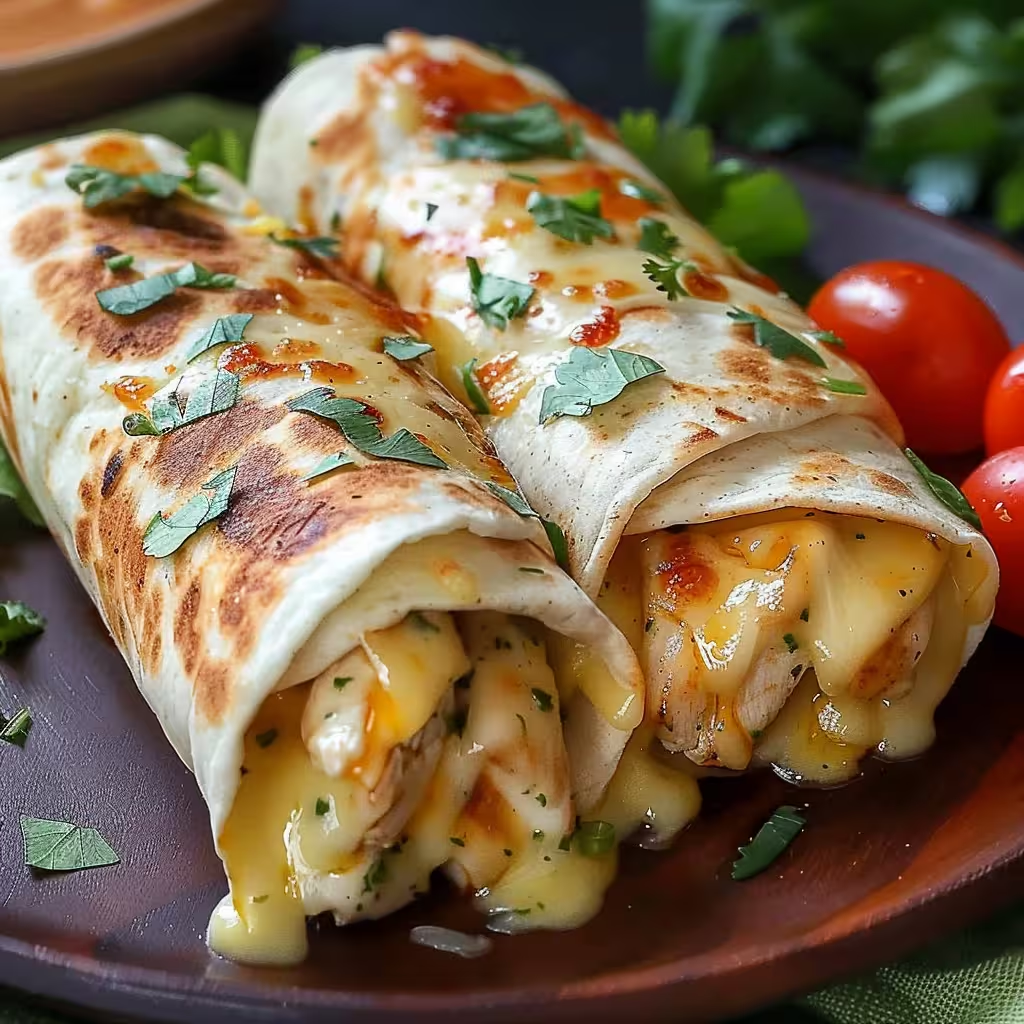
When you need a quick, satisfying meal that combines all your favorite comfort food flavors, these Cheesy Garlic Chicken Wraps deliver everything you crave in just 15 minutes. Packed with tender chicken, three types of melted cheese, and brushed with aromatic garlic butter, these golden-crispy wraps transform simple ingredients into an irresistible meal that’s perfect for lunch, dinner, or even a hearty snack.
This easy chicken wrap recipe is ideal for busy weeknights, meal prep sessions, or whenever you want restaurant-quality flavor without the restaurant price tag. The combination of gooey melted cheese and savory garlic butter creates a crispy exterior that gives way to a warm, cheesy interior that will have everyone asking for the recipe.
What Makes These Chicken Wraps So Irresistible
The secret to these exceptional wraps lies in the triple-cheese blend that creates the perfect melty texture, combined with the garlic butter that transforms ordinary tortillas into golden, crispy perfection. Unlike basic chicken wraps, these are cooked until crispy on the outside while maintaining that satisfying cheese-pull on the inside.
The garlic butter adds an aromatic richness that elevates every bite, while the combination of mozzarella, cheddar, and Parmesan provides complex flavor and incredible meltability. This isn’t just a wrap – it’s comfort food at its finest.
Essential Ingredients for Perfect Garlic Chicken Wraps
For the Filling:
- 1 lb cooked chicken breast, shredded or diced – The protein foundation that makes these wraps substantial and satisfying
- 1 cup shredded mozzarella cheese – Provides the classic stretchy cheese pull
- ½ cup shredded cheddar cheese – Adds sharp, tangy flavor and golden color when melted
- ¼ cup grated Parmesan cheese – Contributes nutty depth and helps bind the mixture
- 4 large flour tortillas – The vessel that holds all the delicious filling
For the Garlic Butter:
- 3 tablespoons unsalted butter, melted – Creates the crispy, golden exterior
- 2 cloves garlic, minced – Provides aromatic flavor that permeates every bite
- 1 teaspoon dried parsley – Adds color and subtle herbaceous notes
Step-by-Step Instructions for Crispy Perfection
Step 1: Prepare the Filling
In a large mixing bowl, combine the shredded or diced cooked chicken with all three cheeses: mozzarella, cheddar, and Parmesan. Mix thoroughly until the cheese is evenly distributed throughout the chicken. This ensures every bite has the perfect ratio of protein to melted cheese goodness.
Step 2: Assemble the Wraps
Place one large flour tortilla on a clean, flat surface. Spoon approximately ½ cup of the chicken and cheese mixture into the center of the tortilla. Avoid overfilling, as this can make rolling difficult and cause the filling to spill out during cooking. Fold in the sides of the tortilla first, then roll tightly from bottom to top, creating a secure burrito shape. Repeat this process with the remaining three tortillas.
Step 3: Make the Garlic Butter
In a small bowl, combine the melted butter, minced garlic, and dried parsley. Stir well to ensure the garlic is evenly distributed throughout the butter. This aromatic mixture will create the crispy, flavorful exterior that makes these wraps special.
Step 4: Cook on the Stovetop
Preheat a large skillet or griddle over medium heat. Brush each wrap generously with the garlic butter mixture, making sure to coat all surfaces. Place the wraps seam-side down in the heated skillet to help seal them closed. Cook for 2-3 minutes per side, turning carefully, until they’re golden brown and crispy on all sides. The cheese inside should be fully melted and the exterior beautifully golden.
Step 5: Alternative Oven Method
For a hands-off approach, preheat your oven to 375°F (190°C). Arrange the assembled wraps seam-side down on a parchment-lined baking sheet. Brush thoroughly with garlic butter and bake for 10-12 minutes, flipping halfway through the cooking time. This method works well when making multiple batches or when you prefer a more even browning.
Step 6: Serve Immediately
Serve the wraps hot while the cheese is still melty and the exterior is at its crispiest. These are perfect with a variety of dipping sauces such as ranch dressing, marinara sauce, or homemade garlic aioli.
Pro Tips for Restaurant-Quality Results
Chicken Preparation: Use rotisserie chicken for convenience, or cook chicken breasts specifically for this recipe by seasoning with salt, pepper, and garlic powder before baking at 375°F until internal temperature reaches 165°F.
Cheese Selection: The three-cheese blend is crucial for optimal flavor and texture. Don’t substitute with just one type of cheese – each contributes something unique to the final result.
Rolling Technique: Keep wraps tight but not so tight that they tear. A properly rolled wrap should hold together without being overly compressed.
Temperature Control: Medium heat is essential for stovetop cooking. Too high and the outside burns before the cheese melts; too low and you won’t achieve that golden crispiness.
Fresh Garlic vs. Powder: Fresh minced garlic provides the best flavor, but in a pinch, you can substitute with ½ teaspoon garlic powder mixed into the melted butter.
Nutritional Information and Dietary Modifications
Each wrap contains approximately 380 calories and provides excellent protein from the chicken and calcium from the cheese blend. These wraps offer a good balance of protein, carbohydrates, and healthy fats.
Dietary Adaptations:
- Lower Carb Version: Use low-carb tortillas or large lettuce leaves as wraps
- Gluten-Free Option: Substitute with certified gluten-free tortillas
- Lighter Version: Use reduced-fat cheese varieties and cooking spray instead of butter
- Dairy-Free Alternative: Replace cheeses with dairy-free alternatives and use olive oil instead of butter
Creative Variations and Flavor Combinations
Protein Variations:
- Buffalo Chicken: Add hot sauce to the chicken mixture and include crumbled blue cheese
- BBQ Chicken: Mix barbecue sauce with the chicken and add a touch of smoked paprika
- Italian Style: Include sun-dried tomatoes, basil, and Italian seasoning
- Mexican Fusion: Add jalapeños, cilantro, and a Mexican cheese blend
Vegetable Add-Ins:
- Spinach and Artichoke: Fold in chopped spinach and artichoke hearts for a restaurant favorite
- Bell Peppers: Add diced colorful bell peppers for crunch and nutrition
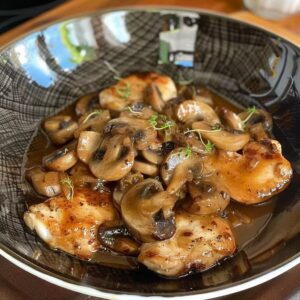
- Mushrooms: Include sautéed mushrooms for earthy flavor
- Caramelized Onions: Sweet onions add depth and complement the garlic perfectly
Sauce Variations:
- Herb Butter: Add fresh thyme, rosemary, or oregano to the garlic butter
- Spicy Version: Include red pepper flakes or cayenne in the butter mixture
- Lemon Garlic: Add fresh lemon zest to the garlic butter for brightness
Perfect Dipping Sauce Combinations
Classic Ranch: The cool, creamy tanginess perfectly balances the rich, garlicky wraps
Marinara Sauce: Creates an Italian-inspired combination that’s both familiar and delicious
Garlic Aioli: Double down on the garlic flavor with a homemade or store-bought aioli
Honey Mustard: Sweet and tangy combination that complements the savory filling
Buffalo Sauce: For those who like a spicy kick with their comfort food
Meal Prep and Storage Solutions
These wraps are excellent for meal preparation and can be made several ways:
Make-Ahead Assembly: Prepare wraps up to 24 hours in advance, wrap individually in plastic wrap, and refrigerate. Cook just before serving.
Freezer Preparation: Assemble wraps, wrap tightly in foil or plastic wrap, and freeze for up to 3 months. Thaw overnight in refrigerator before cooking.
Leftover Storage: Cooked wraps can be stored in the refrigerator for up to 3 days. Reheat in a skillet over medium heat or in a 350°F oven for 5-7 minutes.
Batch Cooking: Double or triple the recipe and freeze cooked wraps individually. Reheat directly from frozen in the oven at 375°F for 12-15 minutes.
Serving Suggestions and Meal Ideas
Light Lunch Combination:
Serve one wrap with a fresh green salad dressed with vinaigrette and some fresh fruit for a balanced, satisfying lunch.
Hearty Dinner Option:
Pair with roasted vegetables, sweet potato fries, or a hearty soup for a complete dinner experience.
Party Appetizers:
Cut wraps into pinwheels and serve as finger foods for parties or gatherings. Provide small cups of various dipping sauces for variety.
Game Day Snacks:
These wraps are perfect for watching sports – easy to eat, satisfying, and crowd-pleasing.
Cost-Effective Family Meal Planning
This recipe provides four substantial servings for approximately $8-10, making it an economical choice for families. Using rotisserie chicken or cooking chicken in bulk reduces preparation time and cost per serving.
The ingredients are pantry and refrigerator staples that can often be purchased in bulk, and the recipe easily scales up for larger families or meal prep sessions.
Troubleshooting Common Issues
Wraps Fall Apart: Ensure tortillas are at room temperature for easier rolling, and don’t overfill them. Rolling too loosely can also cause issues.
Cheese Doesn’t Melt Completely: Cook over medium heat for longer, or pre-warm the filling slightly before assembling.
Burning on Outside: Lower the heat and cook longer, or brush with less butter initially and add more as needed.
Soggy Wraps: Make sure chicken is well-drained if using leftovers, and serve immediately after cooking for best texture.
The Science Behind Perfect Crispy Wraps
The garlic butter serves multiple purposes: it creates a barrier that helps achieve even browning, adds flavor, and helps the herbs adhere to the surface. The combination of proteins and sugars in the butter undergoes the Maillard reaction when heated, creating that golden-brown color and complex flavors.
The cheese blend melts at different rates, with mozzarella providing stretch, cheddar adding flavor, and Parmesan contributing to binding and taste complexity.
Why Homemade Beats Restaurant Versions
Making these wraps at home allows you to control ingredient quality, customize filling amounts, and adjust seasonings to your preferences. Restaurant versions often contain preservatives, excess sodium, and lower-quality ingredients, while homemade versions use fresh ingredients and can be customized for dietary needs.
The cost savings are significant – restaurant chicken wraps typically cost $8-12 each, while these homemade versions cost approximately $2-3 per wrap with superior ingredients and larger portions.
Conclusion: Your New Go-To Comfort Food
These Cheesy Garlic Chicken Wraps represent the perfect intersection of convenience, flavor, and satisfaction. With just a handful of simple ingredients and 15 minutes of active cooking time, you can create a meal that rivals expensive restaurant options while providing the comfort and customization of home cooking.
The crispy exterior, melty cheese interior, and aromatic garlic butter make these wraps irresistible to both kids and adults. Whether you’re looking for a quick lunch solution, an easy dinner option, or a crowd-pleasing party appetizer, this recipe delivers consistent results that will have everyone coming back for more.
Make these once, and they’ll become a regular part of your meal rotation – the combination of simplicity, affordability, and incredible taste makes them the ultimate comfort food solution for busy lifestyles.
Related posts:
 How to Make Taco Bell Nacho Fries at Home: The Ultimate Copycat Recipe
 Classic Chicken Marsala: Master This Elegant Italian-American Restaurant Favorite at Home
 Weeknight Chicken Cordon Bleu: Transform Your Dinner Routine with This 30-Minute Restaurant Classic
 Overnight Focaccia
 Chili Cornbread Bowl! Hearty chili meets cornbread perfection
 The Perfect Baked Potato: Crispy Outside, Fluffy Inside
 Air Fryer Parmesan Chicken Tenders
 Doritos Chicken Tenders