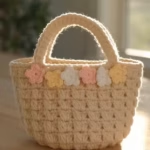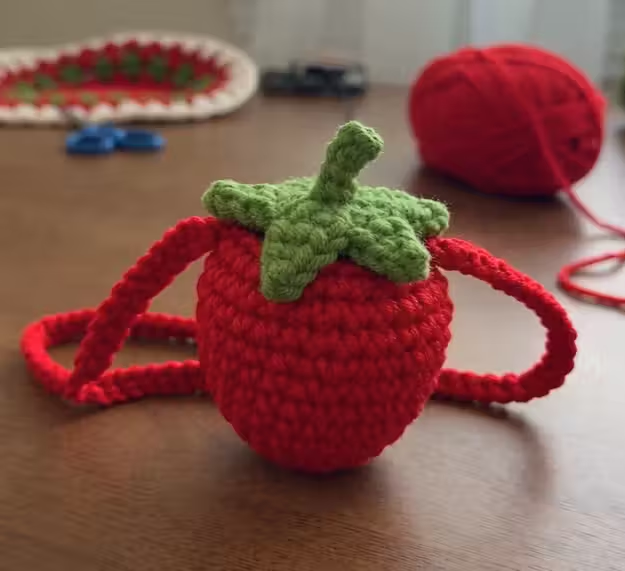
If you love cute crochet projects that are both fun to make and useful, this Crochet Strawberry Mini Bag is a project you’ll want to add to your list. With its sweet strawberry shape, leafy green top, and simple handmade texture, this little bag makes an adorable accessory, gift, or small project for using up leftover yarn.
The best part is that you don’t need a complicated pattern to create something that looks special. The strawberry shape comes together with basic crochet stitches, while the green leafy top adds the perfect finishing touch.
Whether you’re an experienced crocheter or comfortable with the basics, this project is a fun way to make something completely different from a traditional crochet bag.
Why You’ll Love This Crochet Strawberry Bag
This mini bag is small, lightweight, and full of personality. It can be used as a tiny purse, gift bag, coin pouch, or even a cute accessory for a child.
Here are a few reasons to try it:
- It’s a quick and satisfying crochet project.
- The strawberry design makes it unique and playful.
- It’s a great way to use small amounts of yarn.
- You can customize the colors and strap length.
- It makes a thoughtful handmade gift.
- The project can be adapted for different sizes.
The finished bag also has that charming handmade look that makes crochet projects so special.
Materials You’ll Need
To make your strawberry mini bag, gather the following supplies:
- Red medium-weight yarn
- Green yarn for the leaves
- Cream or white yarn for small strawberry details
- Crochet hook appropriate for your yarn
- Yarn needle
- Scissors
- Stitch marker
- Small amount of stuffing, optional
- Measuring tape, optional
You can use cotton yarn if you want a more structured bag, or a soft acrylic yarn for a lighter and slightly softer finish.
Crochet Abbreviations
This tutorial uses common US crochet terminology:
- ch – chain
- sc – single crochet
- hdc – half double crochet
- dc – double crochet
- sl st – slip stitch
- st – stitch
- inc – increase
- dec – decrease
If you are still learning crochet, don’t worry. Most of the strawberry bag is made using simple stitches and basic shaping.
Step 1: Crochet the Strawberry Body
Start with your red yarn.
Create a magic ring and work single crochet stitches into the center. Pull the ring closed and place a stitch marker so you can easily keep track of your rounds.
Continue working in the round, increasing gradually to create a rounded shape.
The important thing is to keep your stitches fairly even. As the piece grows, you’ll notice that the crochet begins to form the rounded bottom of the strawberry.
Continue crocheting until the base reaches the size you want for your mini bag.
Helpful Tip
If your stitches are very tight, try using a slightly larger crochet hook. If your fabric feels too loose and floppy, a smaller hook may give you better structure.
Step 2: Build the Strawberry Shape
Once the base is wide enough, continue crocheting without adding as many increases.
This allows the sides of the bag to grow upward.
Keep working in rounds with red yarn until the bag reaches your preferred height.
For a traditional strawberry shape, you can gradually reduce the width toward the top. This gives the bag a more rounded bottom and slightly narrower opening.
Try placing the piece on a flat surface occasionally to check its shape.
The goal is to create a small pouch rather than a completely flat circle.
Step 3: Shape the Top
When you reach the upper section of the strawberry, begin working a few decrease rounds.
The decreases bring the sides inward and create the characteristic strawberry shape.
Be careful not to make the opening too small. You still want enough space to comfortably put small items inside the bag.
At this stage, you can also check how the bag looks when gently filled with a few small objects.
Step 4: Add the Strawberry Details
Now it’s time to give the bag its strawberry-inspired appearance.
Using cream or white yarn, add small decorative stitches across the red body.
These tiny details resemble strawberry seeds and make the finished project much more recognizable.
You don’t need every seed to be perfectly positioned. In fact, slightly different spacing can make the finished piece look more handmade and natural.
For a subtle design, use only a few seed details.
For a more playful look, add them across most of the visible surface.
Step 5: Crochet the Green Leafy Top
Switch to green yarn to create the strawberry leaves.
Start with a small center section and work several pointed leaves around it.
The leaves can be made using chains and a combination of single crochet, half double crochet, and double crochet stitches.
Each leaf should gradually become wider toward the middle and then taper toward the point.
Repeat around the center until you have a leafy strawberry top.
Don’t worry if your leaves aren’t perfectly identical. Slight variations actually make the top look more natural.
Step 6: Attach the Leafy Top
Position the green leafy piece over the opening of the strawberry bag.
Use your yarn needle to securely attach it around the top edge.
Make sure the stitches are strong enough to withstand the bag being opened and closed repeatedly.
Leave the center or opening accessible if your design includes a drawstring or closure.
Take a moment to check the shape from different angles.
The green leaves should sit naturally over the red strawberry body.
Step 7: Make the Crochet Strap
For the strap, use red yarn or green yarn depending on the look you prefer.
Chain until the strap reaches your desired length.
Work single crochet stitches back across the chain to create a stronger and thicker strap.
For an extra sturdy strap, make several rows instead of using a single chain.
A shorter strap creates a cute hand-held mini purse, while a longer strap allows the bag to be worn over the shoulder.
Once the strap reaches the desired length, secure the yarn and weave in the ends.
Step 8: Attach the Strap
Place both ends of the strap evenly on opposite sides of the bag.
Sew them securely into place using a yarn needle.
For a bag that will carry heavier items, reinforce each attachment point with several passes of yarn.
Give the strap a gentle pull before finishing to make sure it feels secure.
Step 9: Finish the Bag
Weave in all remaining yarn ends carefully.
Trim any excess yarn close to the fabric without cutting the stitches.
Give the bag a gentle reshape with your hands.
If necessary, lightly steam or block the crochet piece according to the type of yarn you used.
Avoid excessive heat, especially when working with synthetic yarn.
Your strawberry mini bag is now ready to use!
Easy Ways to Customize Your Strawberry Bag
One of the best things about this project is how easy it is to personalize.
Change the Strawberry Color
You don’t have to use traditional red.
Try:
- Pink and green
- Dark red and forest green
- Coral and mint
- Burgundy and sage
- Soft pink and cream
You can even create a whole collection of different-colored strawberry bags.
Make It Larger
Want a more practical everyday bag?
Simply continue increasing the base and add more rounds to the sides before shaping the top.
You can also make the strap longer for a comfortable crossbody style.
Add a Drawstring
A drawstring closure can make the bag more secure.
Crochet a small channel around the opening and thread a matching cord through it.
This is especially useful if you plan to carry small items that could easily fall out.
Add a Lining
For a more finished bag, add a simple fabric lining.
A lining can help prevent small objects from slipping through the crochet stitches and gives the bag additional structure.
What Can You Put Inside a Strawberry Mini Bag?
Even though this is a small bag, it can be surprisingly useful.
Try using it for:
- Coins
- Lip balm
- Earbuds
- Small accessories
- Hair clips
- Keys
- Small toys
- Gift cards
- Candy
- Jewelry
It can also make a cute handmade gift bag for birthdays, baby showers, or summer parties.
Tips for Making a Better Crochet Bag
Keep Your Tension Consistent
Consistent tension helps the bag maintain an even shape.
If your stitches become noticeably tighter or looser during the project, the strawberry may become uneven.
Count Your Stitches
It can be tempting to crochet without counting, especially when working in rounds.
However, checking your stitch count regularly helps prevent accidental increases or decreases.
Secure the Strap Well
The strap is one of the areas that receives the most stress.
Use extra stitches when attaching it to the bag so it doesn’t loosen with use.
Choose the Right Yarn
Cotton yarn is a great option when you want a firm, structured bag.
Acrylic yarn works well when you want something soft and lightweight.
For a more premium look, you can experiment with cotton blends or other sturdy yarns.
How to Care for Your Crochet Strawberry Bag
To keep your handmade bag looking its best, avoid placing it in situations where it could become heavily stretched.
If it gets dirty, follow the washing instructions for your particular yarn.
When washing by hand, use gentle detergent and avoid aggressive scrubbing.
After washing, reshape the bag while it is still slightly damp and allow it to dry completely before using it again.
A Fun Handmade Gift Idea
This strawberry crochet bag makes a wonderful handmade gift because it feels personal and unique.
You could fill the bag with small treats, lip balm, jewelry, candy, or other little surprises.
For a summer-themed gift, pair it with a handmade scrunchie or another small crochet accessory.
You can also make several strawberry bags in different colors for friends and family.
Final Thoughts
The Crochet Strawberry Mini Bag is one of those projects that is simple enough to enjoy but unique enough to get plenty of attention.
The combination of the red strawberry body, tiny seed details, leafy green top, and handmade strap creates a fun accessory that can be customized in countless ways.
Whether you’re making one for yourself, preparing a handmade gift, or simply looking for a creative weekend crochet project, this little strawberry bag is a sweet project to add to your crochet collection.
Once you make one, you may find yourself wanting to experiment with different colors, sizes, straps, and decorative details.
Project Details
Project Type: Crochet Bag
Skill Level: Beginner to Intermediate
Main Stitch: Single Crochet
Yarn: Medium-weight yarn
Main Colors: Red, Green, Cream
Bag Style: Mini / Small Purse
Best For: Gifts, Accessories, Summer Projects, Scrap Yarn Projects