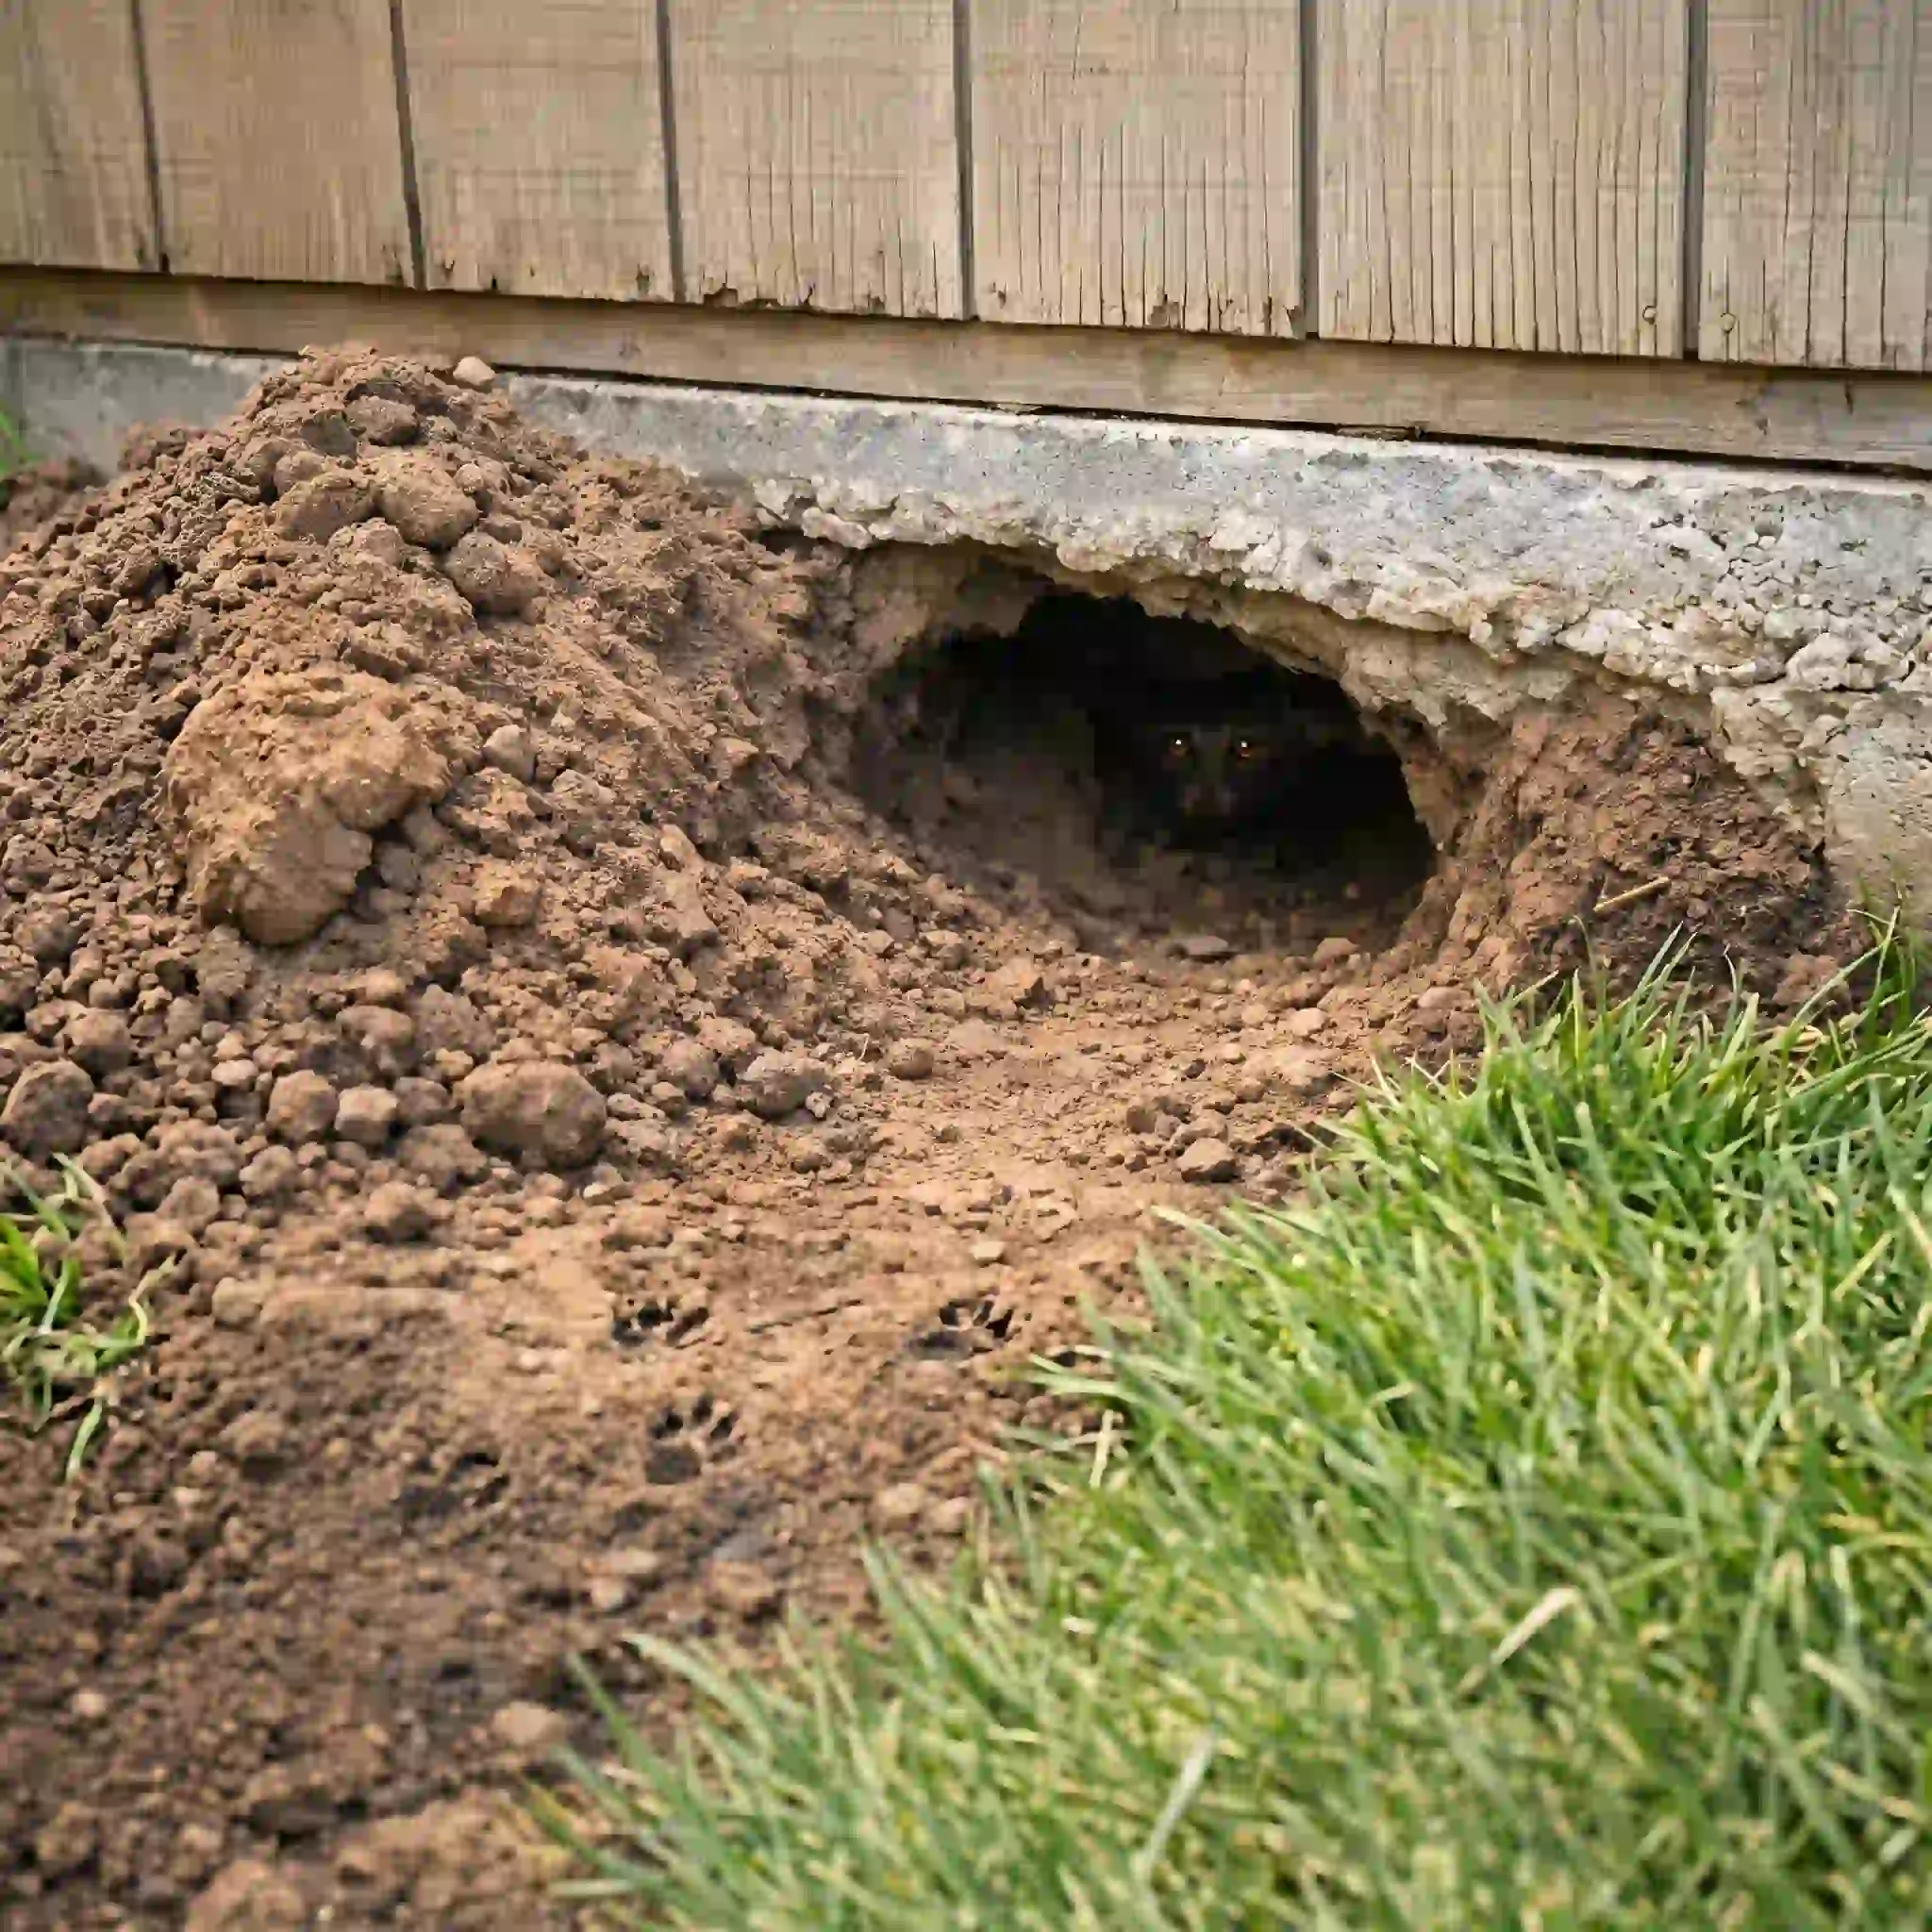
You walk out one morning, coffee in hand, and notice a dark hole at the base of your garden shed. You shovel some dirt in, tamp it down, and figure that’s the end of it. The next day, the hole is back — sometimes bigger. And now you’re starting to wonder how far that tunnel goes, what’s living in it, and whether the slab your shed sits on is about to start cracking.
This is one of those problems that escalates quietly. Burrowing animals don’t announce themselves, and by the time you can clearly see the damage, you’re often dealing with a structural issue rather than a pest issue. Here’s how to identify what you’re dealing with, get rid of it, and make sure nothing else moves into the same hole next month.
Step One: Figure Out What’s Actually Down There
Filling the hole isn’t going to work until you know who’s digging it. Different animals leave different signatures, and the right deterrent depends on the species.
Groundhogs (woodchucks) are the most common culprit for big tunnel networks under sheds, decks, and porches. Their main entrance hole is wide — usually 6 to 12 inches across — with a noticeable mound of fresh dirt fanned out beside it. They almost always have at least one secondary “escape” hole some distance away, often without a dirt mound, which is harder to spot.
Skunks dig smaller holes (4 to 6 inches) and don’t usually create extensive tunnel systems. If the hole is shallow and the smell is unmistakable, you’ve got your answer.
Raccoons rarely tunnel — they prefer existing cavities. If something is climbing into a gap rather than excavating one, that points more toward raccoons or opossums.
Rats make smaller holes (2 to 3 inches) but can chew through surprising amounts of material. A network of small holes around the base of a shed is a rat sign, not a groundhog one.
Armadillos (in southern regions) leave shallow, cone-shaped diggings rather than proper burrows.
The fastest way to confirm is a cheap trail camera pointed at the hole for a couple of nights. Twenty euros and a memory card will tell you more than hours of speculation. Track patterns help too — groundhog tracks show five toes, are about 2 to 3 inches wide, and the back foot leaves a longer print than the front.
Why Your Shed Specifically?
Groundhogs are picky tenants. They want shelter that’s:
- Solid overhead — the concrete slab above their burrow protects them from digging predators and weather
- Edge-accessible — they almost always start their tunnel at the corner or edge of a structure, not the middle of an open lawn
- Near food — vegetable gardens, clover lawns, and overgrown vegetation are all groundhog buffets
- Quiet — sheds get foot traffic once a week at most, which is exactly what they want
If your shed is at the back of the yard, near a garden bed, with some weedy edges around it, you’ve essentially built a luxury condo for one. That’s not your fault, but it explains why the hole keeps coming back. The location is too good for them to give up easily.
How Much Damage Can a Tunnel Actually Do?
This is the part most people underestimate. Groundhog burrows aren’t single tubes — they’re networks. A mature burrow system can run 8 to 66 feet long with multiple chambers at depths of up to 5 feet. They include sleeping areas, food caches, latrine chambers (yes, really), and emergency exits.
Under a concrete slab, the problems develop in stages:
- Soil displacement. As the animal digs, it pushes soil out — soil that was originally compacted to support the slab.
- Void formation. Empty pockets form under sections of the slab where there used to be solid earth.
- Settlement and cracking. When the slab loses support in spots, it starts settling unevenly. You’ll see hairline cracks first, then visible separation between the slab and the shed walls.
- Door and frame misalignment. This is the giveaway most people notice first — the shed door suddenly won’t close right, or the floor feels uneven when you walk in.
Inspect the slab regularly. Look for fresh cracks, gaps between the slab and the shed walls, doors that have started to bind, or any tilt to the structure. Catching it at the hairline-crack stage is a hundred-times cheaper than dealing with full slab replacement.
Quick Fixes for Right Now
While you’re working out a permanent plan, you can slow things down:
- Heavy stones or pavers over the visible entrance buy you a night or two, but a determined groundhog will dig around them.
- Hardware cloth (not chicken wire) stuffed deep into the hole and weighted down is more effective. Groundhogs can chew through chicken wire — they cannot easily chew through galvanized hardware cloth.
- Loose gravel packed into the tunnel makes re-excavation difficult and unrewarding.
These are stalling tactics. They’re not solutions. Don’t pour concrete into an active burrow — you can trap an animal inside, which is both inhumane and creates a much worse problem when it dies and decomposes under your shed.
Making the Burrow Unattractive (Without Trapping)
Often the easiest path is to make the spot unpleasant enough that the groundhog leaves voluntarily. A few approaches that actually work:
Disturbance. Groundhogs hate being startled. A motion-activated sprinkler aimed at the burrow entrance is one of the more effective tools — sudden water bursts when they emerge make them rethink the location within a few days.
Smell. Predator urine (coyote, fox) sold at hunting and garden stores triggers a real fear response. Apply it around the entrance and reapply every few days, especially after rain. Used kitty litter from a neighbor’s cat works on the same principle and is free.
Vibration. Sticking a couple of small windmills or vibrating stakes in the ground near the burrow makes the soil feel unsafe. Solar-powered ultrasonic stakes have mixed reviews — some animals ignore them, others move on within a week.
Light. A motion-activated floodlight pointed at the entrance disrupts their normal nighttime activity patterns.
The combo approach. Stack two or three of these together rather than picking one. Sprinkler plus predator urine plus a vibrating stake will move most groundhogs along inside a week. A single tactic gives them time to adapt.
Avoid mothballs, ammonia, gasoline, smoke bombs, or any “flooding” approach. They’re either ineffective, illegal in most jurisdictions, dangerous to other animals, or all three.
Trapping and Relocating: Read the Local Rules First
If harassment doesn’t work, live trapping is the next step — but check your local wildlife laws before you set a trap. In many regions, relocating a trapped animal more than a short distance is illegal, and some areas require a permit or licensed professional to handle the relocation. Dumping a groundhog on someone else’s property or in a public park is illegal almost everywhere.
If trapping is allowed where you live:
- Use a live trap at least 12 × 12 × 32 inches — smaller traps don’t work for full-grown groundhogs
- Place it directly in front of the active entrance, with the trap door facing the hole
- Bait with apple slices, cantaloupe, or fresh greens — they prefer juicy fruit to dry food
- Cover the trap with a towel or piece of plywood to make it feel like a tunnel
- Check the trap every morning and evening — leaving an animal in a hot trap for a full day is cruel and in many places illegal
Once captured, follow the local rules for relocation distance and approved release sites. If your area requires professional handling, just call wildlife control. The fee is reasonable compared to the alternative.
Sealing the Burrow — Only Once You’re Sure It’s Empty
This is where people make the mistake that turns a pest problem into a much bigger one. Never seal an active burrow. Confirm it’s empty first.
Two reliable ways to check:
- Loose dirt test. Lightly pack the entrance with crumpled newspaper or loose soil. If it’s undisturbed for three to four days running (during warm weather, when groundhogs are active), the burrow is likely vacant.
- Trail camera confirmation. Run the camera for a full week with no activity before sealing.
Once you’re confident no one’s home:
- Fill the tunnel as deeply as you can reach with gravel or a soil-cement mix (4 parts soil, 1 part Portland cement)
- Cover the entrance with hardware cloth that extends at least 12 inches down and 12 inches outward in an L-shape
- Backfill the wire with soil and tamp firmly
The L-shaped wire apron is the key part. Animals can dig down, but most won’t keep digging when they hit wire that extends outward — they assume the obstacle continues indefinitely.
The Permanent Fix: A Dig-Proof Perimeter
If you want to stop this from ever happening again — to your shed or any future one — install a perimeter barrier:
- Galvanized hardware cloth (½-inch mesh, not chicken wire)
- Buried 12 to 18 inches deep along the entire perimeter of the shed
- Bent outward at 90 degrees to form a 12-inch underground apron
- Extending at least 24 inches above ground if climbing animals are also a concern
This is a weekend job for one person, two hours with help. Once it’s in, you’re done. Burrowing animals will probe the edge, hit wire, dig down a few inches, hit more wire angling outward, and give up.
Add a layer of crushed gravel against the foundation as a final touch. Animals dislike digging through gravel — it doesn’t compact the way soil does, so each scoop just collapses back in.
Repairing the Slab If Damage Has Already Started
If you’ve already got cracks, deal with them now rather than next year:
- Hairline cracks (less than 1/8 inch) — clean them out with a wire brush and fill with a concrete crack sealant. Easy DIY job.
- Wider cracks or visible settlement — use a polyurethane concrete repair compound or have a professional inject expanding foam beneath the slab to lift it back into place.
- Significant tilt or major cracking — this is where you call a structural professional. Foundation repair on a small shed slab is usually a few hundred euros; replacing a shed that’s collapsed onto its tilted slab costs ten times that.
If you’ve removed the animal and sealed the tunnel, repair the slab afterward, not before. New cracks will form if you patch over a still-active void underneath.
Making the Whole Yard Less Attractive
Even with a perfect barrier on the shed, groundhogs in your yard will keep looking for somewhere else to dig. Reducing the overall appeal of your property helps:
- Keep grass short. Groundhogs prefer cover. A regularly mown lawn is far less appealing than overgrown edges.
- Remove brush piles and woodpiles from areas near structures. These are favorite staging spots.
- Fence vegetable gardens with the same hardware-cloth-buried-and-bent-outward approach. Use chicken wire for the above-ground portion.
- Plant deterrent species. Daffodils, alliums, lavender, and crown imperial are all unattractive to groundhogs.
- Use garlic or hot pepper spray on prized plants during peak season.
You won’t make your yard groundhog-proof at the property line, but you can make it less appealing than the neighbor’s yard. That’s usually enough.
When to Just Call Someone
There’s no prize for handling this entirely yourself. Call wildlife control or a structural pro when:
- The animal won’t leave despite multiple deterrents and a trap
- You can’t legally relocate trapped wildlife in your area
- The slab has significant cracking, visible tilt, or doors that no longer close
- You suspect the burrow extends under more than just the shed (under your house, for example)
- You’ve never used hardware cloth, mortar, or worked with concrete and aren’t keen to learn this week
Most local councils maintain lists of licensed wildlife control operators, and a single visit usually costs less than what one season of damage would. Structural assessments are often free or low-cost as part of a quote for repair work.
The short version: identify what’s actually down there, make the spot unpleasant or remove the animal, confirm the burrow is empty, seal it properly with wire-reinforced fill, and install a perimeter barrier so this doesn’t repeat. Repair any slab damage once the underlying cause is dealt with — not before.
Done in that order, this is a one-weekend problem. Done out of order or in a panic, it can drag on for years and end with a shed that needs replacing. You’ve already noticed the issue early enough to do this the easy way.


