Cheesy Taco Sticks take all the bold, savory flavor of classic tacos and wrap it in warm, golden pizza dough for the ultimate handheld meal. These cheesy, beef-filled bites are made for dipping, sharing, and devouring—perfect for game day snacks, casual weeknight dinners, or fun party appetizers. With just a handful of ingredients and minimal prep, this recipe transforms pantry staples into a crispy, cheesy, flavor-loaded finger food.
Imagine everything you love about tacos—seasoned ground beef, melty cheese, buttery garlic topping—tucked into soft pizza dough and baked to golden perfection. Every bite delivers the comforting warmth of melted cheese, the satisfying spice of taco meat, and the indulgent finish of garlic butter. Best of all? They’re endlessly customizable and kid-approved.
Why This Recipe Works
The secret to Cheesy Taco Sticks lies in balance and layering: the savory, seasoned ground beef is complemented by rich Colby Jack and cheddar cheese, wrapped in soft yet crisped pizza dough, and finished with a brush of garlic-herb butter that takes them over the top. Baked, not fried, these sticks are easy to make and quick to disappear. Whether served as a snack, side, or main dish, they’re guaranteed to win over even picky eaters.
Ingredients You’ll Need
For the Taco Filling
- 1 pound ground beef – Classic taco base; juicy and flavorful
- 1 packet taco seasoning mix – Adds bold flavor (store-bought or homemade)
For the Stick Assembly
- 1 tube Pillsbury pizza dough – Provides a soft, golden crust that wraps everything neatly
- 5 Colby Jack and cheddar cheese sticks, halved – Melts into gooey perfection inside each roll
For the Garlic Butter Topping
- 4 tablespoons butter, melted – Rich finishing touch for added flavor
- 1 teaspoon garlic powder – Adds aromatic depth
- 1 teaspoon dried parsley – For a pop of color and herbaceous flair
Step-by-Step Instructions
1. Preheat the Oven
Begin by preheating your oven to 425°F (220°C). Lightly coat a large baking sheet with non-stick spray or line with parchment paper.
2. Make the Taco Filling
In a large skillet over medium heat, cook the ground beef, breaking it apart with a wooden spoon until fully browned and crumbled—about 6–8 minutes. Drain excess fat.
Return the pan to the heat and stir in the taco seasoning (no need to add water). Cook for 1–2 more minutes until well coated. Set aside to cool slightly.
3. Prepare the Dough
Unroll the tube of pizza dough onto a lightly floured surface. Flatten slightly with your hands and cut in half lengthwise. Then make 4 even cuts across to form 10 small rectangles.
4. Assemble the Taco Sticks
Spoon about 1 tablespoon of taco meat into the center of each dough rectangle. Place half a cheese stick on top. Carefully roll each one up, pinching all seams and edges tightly to seal and prevent leaks while baking.
5. Add the Garlic Butter Topping
In a small bowl, stir together the melted butter, garlic powder, and parsley. Brush this mixture generously over the tops of each taco stick to give them a golden, garlicky crust.
6. Bake and Serve
Bake in the preheated oven for 10–12 minutes or until the dough is golden brown and cooked through.
Remove from oven and serve hot with your favorite dips—think salsa, sour cream, guacamole, or queso.
Serving Ideas & Flavor Variations
- Make it spicy: Add a dash of cayenne to the beef or toss in some diced jalapeños for heat.
- Add vegetables: Finely chopped bell peppers, onions, or black olives can be added to the filling for extra texture.
- Use different cheese: Pepper Jack adds a kick, while mozzarella melts ultra-smooth.
- Dip variety: Serve with chipotle mayo, ranch, or spicy queso for extra indulgence.
These taco sticks also make a great lunchbox option or after-school snack. Pair them with a side salad for a quick, balanced meal.
Storage & Make-Ahead Tips
Refrigerator: Store cooled taco sticks in an airtight container for up to 3 days.
Reheat: Pop them into an oven or air fryer at 350°F for 5–7 minutes to restore crispiness.
Freezer: Assemble and freeze uncooked taco sticks on a baking sheet. Once frozen, transfer to a freezer bag. Bake directly from frozen, adding a few extra minutes to the cooking time.
Make-Ahead: Cook the taco meat up to 2 days ahead and store in the fridge until ready to assemble.
Frequently Asked Questions
Q: Can I use crescent roll dough instead of pizza dough?
A: Yes! Crescent dough will yield a flakier, more buttery result—just be sure to seal the seams well.
Q: Can I make these vegetarian?
A: Absolutely. Use plant-based ground meat or a black bean taco filling as a substitute.
Q: What kind of cheese works best?
A: Colby Jack and cheddar give the best melt and flavor, but mozzarella, Pepper Jack, or Monterey Jack are great alternatives.
Q: Can I use homemade taco seasoning?
A: Yes. A mix of chili powder, cumin, paprika, garlic powder, onion powder, oregano, and salt works perfectly.
Q: How do I keep them from opening while baking?
A: Make sure to pinch the seams tightly and place them seam-side down on the baking sheet.
Q: Can I prep these ahead of time and bake later?
A: Yes. Assemble them, cover with plastic wrap, and refrigerate for up to 12 hours before baking.
Q: Can I cook these in an air fryer?
A: Definitely. Air fry at 375°F for 8–10 minutes, turning once halfway through for even browning.
Q: Can I double the recipe?
A: Yes! This recipe doubles easily. Just make sure not to overcrowd your baking sheet.
Q: Can I use ground turkey instead of beef?
A: Yes, ground turkey works well and gives a leaner option with similar flavor when well-seasoned.
Q: Are these good cold or room temp?
A: They’re best hot and fresh, but still enjoyable at room temp for parties or packed lunches.
Cheesy Taco Sticks are more than just a clever twist on taco night—they’re a celebration of flavor, texture, and convenience. From the first bite of gooey cheese and zesty beef to the last buttery crunch, these golden, dippable delights are sure to become a household favorite. Whether you’re hosting friends or feeding the family, these sticks deliver the fun and flavor everyone craves.
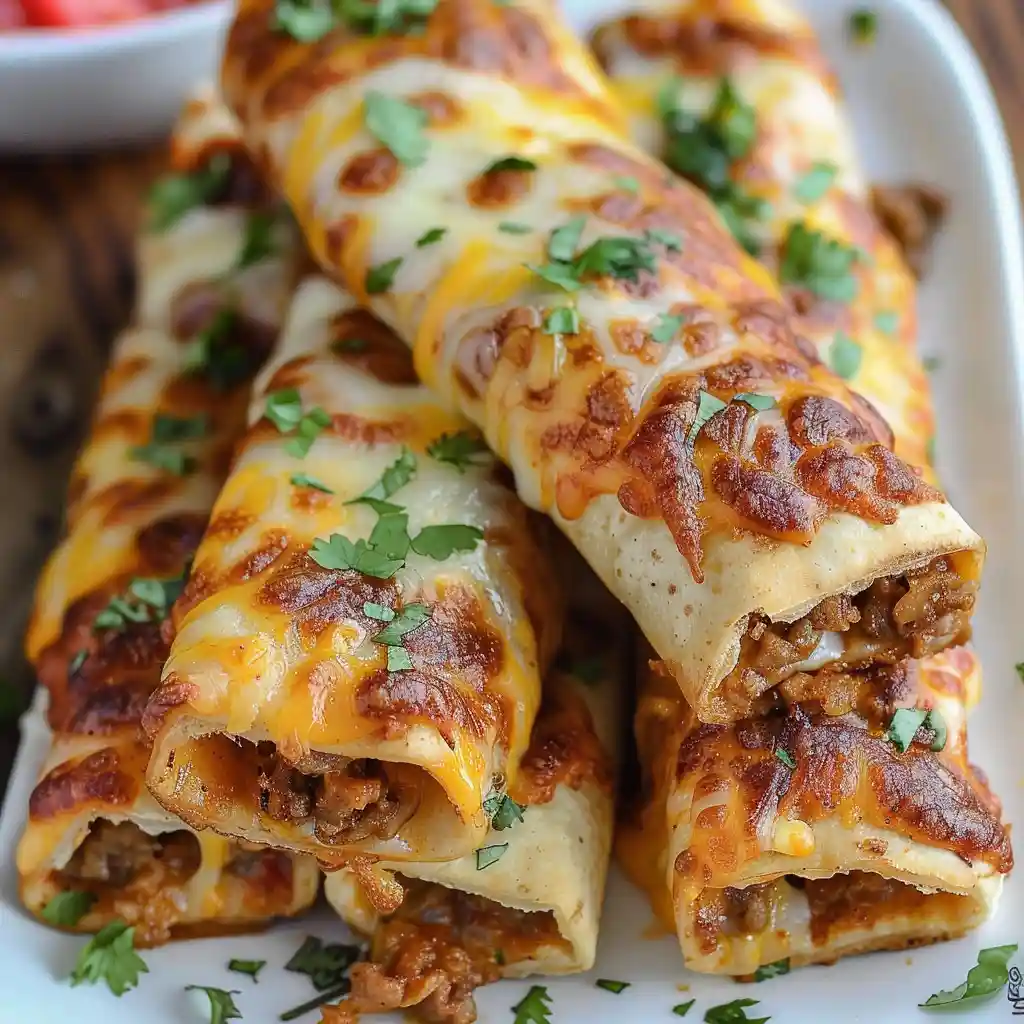
Cheesy Taco Sticks
Ingredients
Method
- Preheat Oven
- Preheat your oven to 425°F and lightly coat a large baking sheet with non-stick spray. This ensures your taco sticks won’t stick to the pan and will have the perfect baking temperature from the start.
- Cook Ground Beef
- In a large skillet, cook the ground beef over medium heat, breaking it up with a wooden spoon until fully browned and crumbled. Drain any excess fat. Removing the excess fat prevents the dough from becoming soggy during baking.
- Season Beef
- Return the skillet to the stovetop and mix in the taco seasoning packet (dry, without water) until the beef is fully coated. Remove from heat and let cool to room temperature. Allowing the meat to cool prevents the dough from getting soggy when assembling.
- Prepare Dough
- Spread the pizza dough out on a clean surface until flat. Cut in half lengthwise, then make 4 cuts across to create 10 small rectangles total. Even-sized rectangles will ensure consistent cooking time.
- Add Filling
- Place about 1 tablespoon or more of the cooled taco meat in the center of each dough rectangle. Top with half a cheese stick. Don’t overfill or the dough may tear during baking.
- Roll Taco Sticks
- Carefully roll up each pizza stick, making sure to pinch all seams closed tightly to prevent filling from leaking out during baking. Proper sealing is crucial for containing the delicious filling.
- Apply Garlic Butter
- In a small bowl, combine melted butter, garlic powder, and parsley. Brush this mixture generously over the tops of all the taco sticks. This adds flavor and helps achieve a golden-brown finish.
- Bake
- Bake for 10-12 minutes until the tops are golden brown and the dough is cooked through. Serve hot with your favorite taco toppings like salsa, sour cream, or guacamole!
Notes
- For extra flavor, try adding 1/4 cup of diced onions or bell peppers to the ground beef while cooking.
- You can substitute ground turkey or chicken for a leaner option.
- These can be made ahead and refrigerated before baking – just add 2-3 minutes to the baking time.
- For a spicier version, add diced jalapeños or a dash of hot sauce to the meat mixture.
- Leftover taco sticks can be stored in an airtight container in the refrigerator for up to 3 days and reheated in the oven at 350°F for 5-7 minutes.


