Pierogi Ruskie represent the heart and soul of Polish comfort food. These tender, pillowy dumplings filled with creamy potatoes and cheese have been warming Polish families for generations. Despite their name suggesting Russian origins, these beloved dumplings are quintessentially Polish, with “Ruskie” referring to the historical region of Red Ruthenia. This comprehensive guide will teach you to create authentic Pierogi Ruskie that rival those made by Polish grandmothers.
The Cultural Significance of Pierogi
Pierogi hold a special place in Polish culture, appearing at family gatherings, holidays, and celebrations. They’re more than just food – they’re a connection to heritage, a symbol of hospitality, and a labor of love. The process of making pierogi is often a communal activity, bringing families together to roll, fill, and shape these delicious dumplings.
Understanding the Components
Traditional Pierogi Ruskie consists of three essential elements: the tender dough, the creamy potato and cheese filling, and the finishing touches that bring it all together. Each component plays a crucial role in creating the perfect dumpling.
Ingredients You’ll Need
For the Dough:
- 4 cups all-purpose flour (plus extra for dusting) – The foundation of tender pierogi
- ½ teaspoon salt – Enhances flavor and strengthens gluten
- 1 cup boiling water – Creates steam for tender texture
- 3 tablespoons clarified butter – Adds richness and prevents sticking
- 1 large egg (room temperature) – Provides structure and color
For the Filling:
- 1½ pounds Russet potatoes – Starchy potatoes create the perfect texture
- 1¼ cups Twaróg (Quark cheese) – Traditional Polish cheese adds creaminess
- 1 large onion (finely chopped) – Sweet, savory flavor base
- 2 tablespoons clarified butter – For sautéing the onions
- Salt to taste – Essential seasoning
- Fine black pepper to taste – Subtle warmth and depth
For Serving:
- 4 tablespoons unsalted butter – For that golden, crispy finish
- Sour cream – Traditional tangy accompaniment
- Caramelized onions – Sweet and savory garnish
The Art of Pierogi Dough
The secret to perfect pierogi lies in the dough. The combination of boiling water and clarified butter creates a unique texture that’s both tender and strong enough to hold the filling. The hot water partially cooks the flour, resulting in a more pliable dough that’s easier to work with.
Step-by-Step Instructions
Preparing the Dough
Begin by sifting the flour into a large mixing bowl and adding the salt. In a separate bowl, melt the clarified butter in the boiling water, creating a rich, hot mixture. Gradually add this hot butter-water mixture to the flour, mixing with a spoon until combined. The dough will be quite hot at this stage.
Add the room-temperature egg and mix well. The egg should be at room temperature to prevent it from cooking when added to the hot mixture. Transfer the dough to a floured surface and knead for 8-10 minutes until it becomes smooth and elastic. This kneading develops the gluten, giving the dough its characteristic strength and elasticity.
Cover the dough and let it rest for 30 minutes. This resting period allows the gluten to relax, making the dough easier to roll out.
Creating the Perfect Filling
Peel and rinse the potatoes, then place them in a pot with about 4 inches of room from the top. Cover completely with cold water and add 1 tablespoon of salt. Starting with cold water ensures even cooking. Boil on medium heat for about 20 minutes, or until the potatoes are fork-tender.
Drain the water and mash the potatoes thoroughly. Let them cool completely – hot potatoes can make the cheese watery and affect the filling’s consistency.
While the potatoes cool, prepare the onions. Melt the clarified butter in a skillet over medium heat. Sauté the finely chopped onion until golden and soft, approximately 7-10 minutes. The onions should be sweet and caramelized, not browned. Set aside to cool.
Once both components are cool, mash the potatoes again to ensure they’re completely smooth. Combine with the Twaróg cheese, salt, and pepper. Add the cooled sautéed onions and mix well. Taste and adjust seasoning as needed. The filling should be creamy, well-seasoned, and hold together without being too wet.
Shaping the Pierogi
Divide the rested dough into four parts. Roll out one part on a floured surface until it’s about 2 millimeters thin. Keep the other pieces covered with a cotton cloth to prevent drying out.
Using a glass or cookie cutter, cut out circles approximately 3 inches in diameter. Gather the scraps and re-roll them to minimize waste.
To form each pierogi, take a dough circle in your hand and slightly stretch it. Place a spoonful of filling in the center – about a tablespoon is usually perfect. Fold the dough in half to create a semi-circle, then press the edges firmly to seal. Pinch the edges again, creating decorative ruffles that also ensure a tight seal.
Cooking and Serving
Bring a large pot of salted water to a boil. The water should taste like mild seawater. Cook the pierogi in batches to avoid overcrowding. They’re done when they float to the surface, then continue cooking for 1-2 minutes more. Remove with a slotted spoon.
At this point, the pierogi are fully cooked and ready to eat. However, the traditional final step involves frying them in butter for extra flavor and texture.
In a large skillet, melt 4 tablespoons of butter over medium heat. Add the boiled pierogi in batches, frying each side for about 2 minutes until golden and crispy. This creates a beautiful contrast between the crispy exterior and tender interior.
Serving Traditions
Serve your pierogi hot with traditional accompaniments. Sour cream is the classic choice, providing a tangy contrast to the rich dumplings. Caramelized onions add sweetness and depth. Some families also serve pierogi with crispy bacon bits or fresh herbs like dill or chives.
Storage and Reheating
Fresh pierogi can be stored in the refrigerator for up to 3 days. For longer storage, freeze them on a baking sheet before transferring to freezer bags. They’ll keep for up to 3 months. Cook frozen pierogi directly from frozen, adding a few extra minutes to the cooking time.
Variations and Regional Differences
While this recipe represents the classic Pierogi Ruskie, there are many regional variations. Some families add different cheeses, include herbs in the filling, or use different proportions of potato to cheese. The beauty of pierogi lies in these family traditions and personal touches.
Tips for Success
Dough consistency: The dough should be smooth and elastic, not sticky. If it’s too wet, add a bit more flour during kneading.
Filling temperature: Always let the filling cool completely before assembling. Hot filling can make the dough soggy and difficult to work with.
Sealing technique: Proper sealing is crucial. Make sure the edges are completely sealed to prevent the filling from leaking during cooking.
Water temperature: Use boiling salted water for cooking. The salt adds flavor to the pierogi dough.
Batch cooking: Don’t overcrowd the pot when boiling. This can cause the temperature to drop and result in soggy pierogi.
Frequently Asked Questions
Q: What is Twaróg and can I substitute it? A: Twaróg is Polish quark cheese, similar to cottage cheese but drier. You can substitute with farmer’s cheese, ricotta (drained), or even cottage cheese pressed through a sieve to remove excess moisture.
Q: Why use clarified butter instead of regular butter? A: Clarified butter has a higher smoke point and doesn’t burn as easily. It also adds a pure butter flavor without the milk solids that can make regular butter taste bitter when heated.
Q: Can I make the dough ahead of time? A: Yes, the dough can be made up to 24 hours ahead and stored in the refrigerator. Let it come to room temperature before rolling out.
Q: How do I know if my pierogi are properly sealed? A: The edges should be completely pressed together with no air pockets. The decorative pinching not only looks traditional but also ensures a tight seal.
Q: Can I boil and freeze pierogi for later frying? A: Absolutely! Boil the pierogi, let them cool, then freeze on a baking sheet. When ready to serve, fry them directly from frozen.
Q: What’s the best way to reheat leftover pierogi? A: Pan-fry them in butter until heated through and crispy. Avoid microwaving, as it can make them soggy.
Q: Why do my pierogi fall apart during cooking? A: This usually happens due to inadequate sealing or the water boiling too vigorously. Make sure edges are well-sealed and maintain a gentle boil.
Q: Can I make pierogi without eggs? A: Yes, though the texture will be slightly different. The egg adds richness and helps bind the dough, but it’s not absolutely essential.
Print
Polish Pierogi Ruskie Recipe
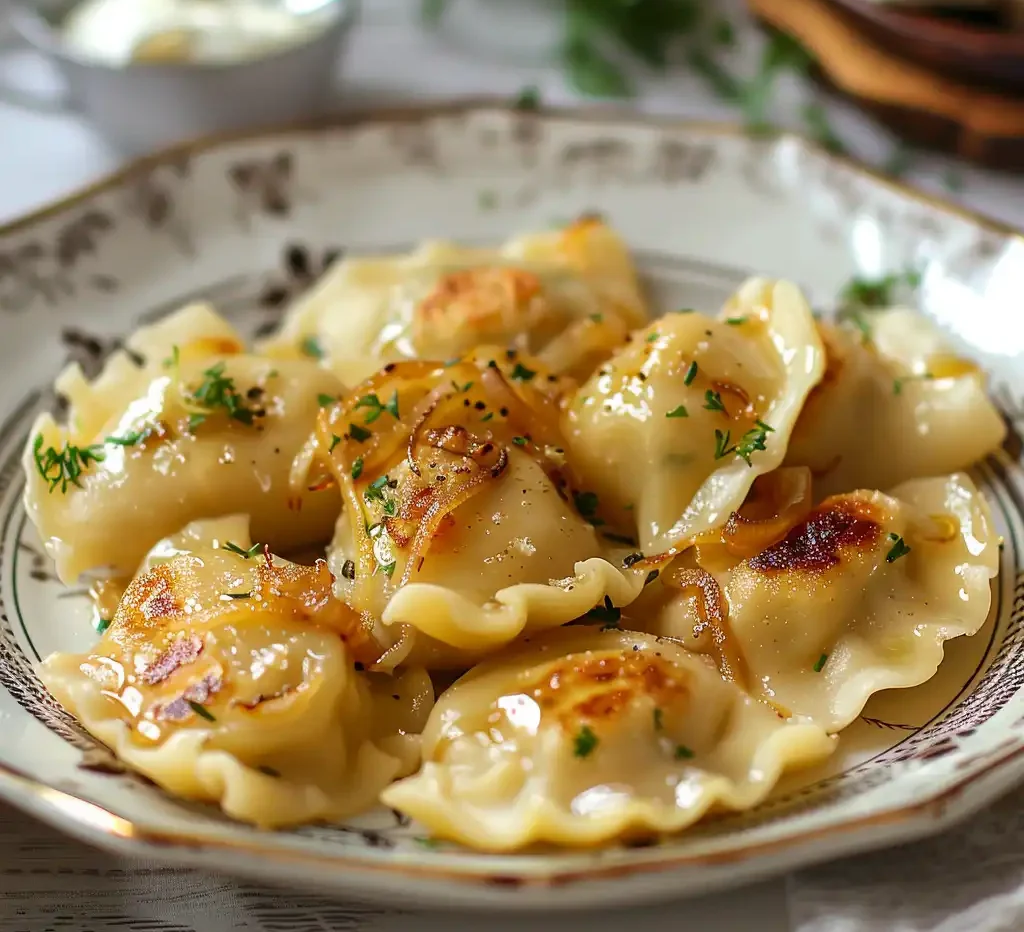
Delicious homemade Polish pierogi filled with creamy potato and cheese mixture, wrapped in a tender dough and pan-fried to golden perfection. These traditional dumplings are a comfort food staple in Polish cuisine, perfect for family gatherings or a hearty meal.
- Total Time: 1 hour 30 minutes
- Yield: About 30–35 pierogi 1x
Ingredients
For the Dough
- 4 cups All-purpose flour (plus extra for dusting)
- 1/2 teaspoon Salt
- 1 cup Boiling water
- 3 tablespoons Clarified butter
- 1 large Egg (at room temperature)
For the Filling
- 1 1/2 pounds Russet potatoes
- 1 1/4 cups Twaróg Quark cheese
- 1 large Onion (finely chopped)
- 2 tablespoons Clarified butter
- Salt (to taste)
- Fine black pepper (to taste)
For Serving
- 4 tablespoons Unsalted butter
- Sour cream
- Caramelised onions
Instructions
- Prepare the Dough: In a large mixing bowl, sift the flour and add salt. In a separate bowl, melt the butter in boiling water. Gradually add the water with melted butter to the flour, mixing with a spoon until combined. Add the egg and mix well.
- Knead the Dough: Transfer the dough to a floured surface and knead for about 8-10 minutes, until smooth and elastic. Cover and let rest for 30 minutes to allow the gluten to relax, which makes the dough more pliable and easier to work with.
- Boil the Potatoes: Peel and rinse the potatoes. Put them in a pot, with around 4 inches of room from the top. Cover completely with cold water and add 1 tablespoon of salt. Boil on medium heat for about 20 minutes, or until soft when pierced with a fork. Drain the water and mash. Leave to cool completely.
- Sauté the Onions: Melt the butter on a skillet or a nonstick pan. Sauté the chopped onion on medium heat in clarified butter, until golden and soft. It should take around 7-10 minutes. The caramelization adds depth of flavor to the filling. Set aside to cool.
- Mix the Filling Ingredients: Mash the boiled potatoes again, until smooth. Combine with cheese, salt, and pepper. Add the cooled, sautéed onions, and mix well. Taste, and add salt and pepper if needed. The filling should be well-seasoned but not overpowering.
- Cut Out the Dough: Divide the dough into four parts. Roll out one part on a floured surface until thin (around 2 millimeters). Cover the other pieces with a cotton cloth, so they don’t dry out. Cut out circles using a glass or a cookie cutter around 3 inches in diameter.
- Form the Pierogi: Take the circle of dough into your hand and slightly stretch it. Place a spoonful of filling on each dough circle, fold in half to form a semi-circle, and press edges to seal. Pinch again the edges, creating decorative ruffles that help keep the filling inside during cooking.
- Cook the Pierogi: Bring a large pot of salted water to a boil. Cook the pierogi in batches until they float to the surface, then continue cooking for about 1-2 minutes more. Remove with a slotted spoon. Be careful not to overcrowd the pot as pierogi need space to cook properly.
- Fry the Pierogi in Butter: In a large skillet, melt 4 tablespoons of butter over medium heat. Add boiled pierogi in batches, frying each side for about 2 minutes or until they are golden and crispy. This step gives the pierogi their characteristic rich flavor and appealing texture.
- Serve Hot: Serve your crispy butter-fried pierogi with sour cream and caramelized onions on the side. The combination of the soft filling, crisp exterior, tangy sour cream and sweet onions creates a perfect balance of flavors and textures.
Notes
- Pierogi can be frozen before cooking. Place them on a floured tray without touching each other, freeze until solid, then transfer to freezer bags.
- If you can’t find Twaróg cheese, you can substitute with farmer’s cheese, ricotta, or a mix of cottage cheese and cream cheese.
- Traditional pierogi ruskie don’t contain meat – the name comes from the Ruthenian region, not Russia.
- The dough should be soft but not sticky. If too sticky, add a little more flour; if too dry, add a little water.
- Prep Time: 1 hour
- Cook Time: 30 minutes
- Category: Main-course
- Method: Stovetop
- Cuisine: Polish
- Diet: Vegetarian
Nutrition
- Serving Size: 5 pierogi
- Calories: 420
- Sugar: 3g
- Sodium: 380mg
- Fat: 16g
- Saturated Fat: 9g
- Unsaturated Fat: 6g
- Trans Fat: 0g
- Carbohydrates: 58g
- Fiber: 4g
- Protein: 12g
- Cholesterol: 75mg