A backyard fire pit transforms any outdoor space into a cozy gathering spot for family and friends. Whether you’re roasting marshmallows with the kids or enjoying evening conversations under the stars, a well-built fire pit becomes the heart of your outdoor living area. This comprehensive guide will walk you through creating a beautiful, safe, and functional square fire pit that will provide years of enjoyment.
Planning Your Fire Pit Project
Before breaking ground, proper planning ensures your fire pit is both safe and enjoyable. Choose a location at least 25 feet away from structures, overhanging branches, and property lines. Check local building codes and HOA regulations, as some areas require permits or have restrictions on open fires.
Consider the size of your gathering space and select a square design that fits your needs. Square fire pits offer excellent stability and a modern aesthetic that complements most landscape designs. The dimensions shown in our example create an ideal balance between functionality and fuel efficiency.
Essential Materials and Tools
Materials Needed:
- Fire bricks (heat-resistant bricks for the interior walls)
- Concrete pavers or natural stone for the surrounding base
- Sand for leveling and base preparation
- Gravel for drainage
- Fire-safe mortar or high-temperature construction adhesive
- Steel fire ring (optional but recommended for longevity)
Tools Required:
- Shovel and spade for excavation
- Level for ensuring even surfaces
- Rubber mallet for setting pavers
- Measuring tape and string line for layout
- Wheelbarrow for material transport
- Safety equipment (gloves, eye protection)
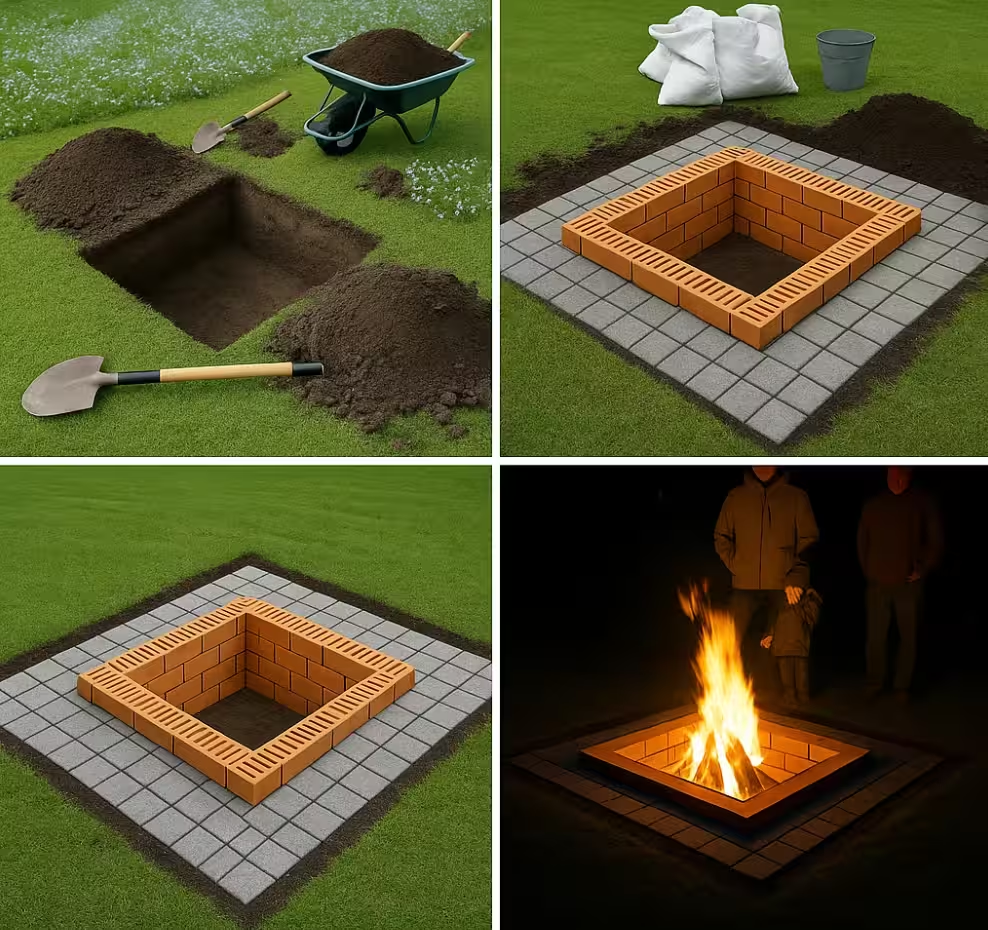
Step-by-Step Construction Process
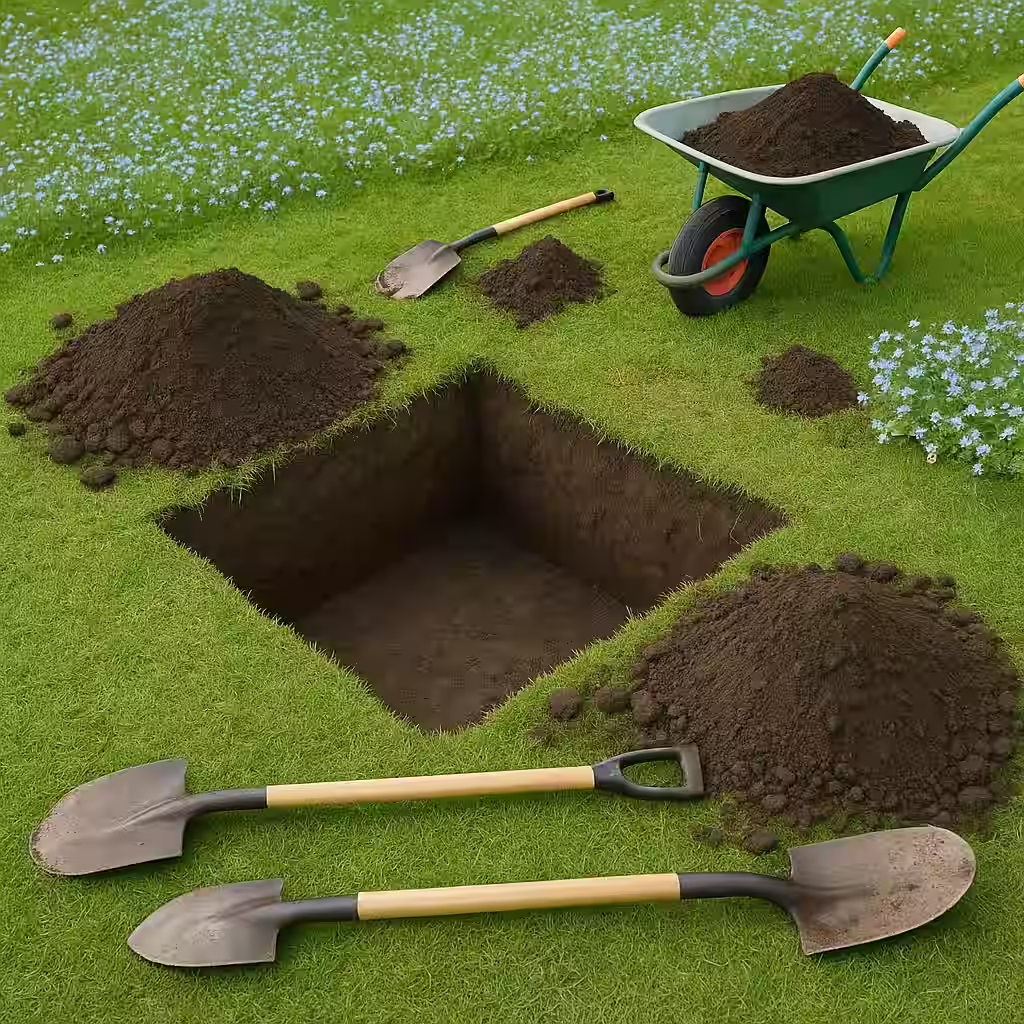
Step 1: Excavation and Site Preparation
Begin by marking your fire pit’s footprint using spray paint or stakes and string. The excavation should extend beyond your planned fire pit dimensions to accommodate the surrounding paver base. Dig down approximately 6-8 inches, creating clean, straight edges.
Remove all grass, roots, and debris from the excavated area. The goal is to create a level, stable foundation that will prevent settling and ensure your fire pit remains structurally sound over time.
Step 2: Creating the Foundation
Add a 2-3 inch layer of compactable gravel to the bottom of your excavation. This drainage layer prevents water accumulation that could cause frost damage in colder climates. Compact the gravel thoroughly using a hand tamper or plate compactor.
Next, add a 1-2 inch layer of sand over the gravel. Use a screed board to level the sand perfectly – this layer provides the final leveling surface for your pavers and fire bricks.
Step 3: Installing the Paver Base
Begin laying your concrete pavers or natural stone around the perimeter where your fire pit will sit. Start from one corner and work systematically, ensuring each paver is level with its neighbors. Use a rubber mallet to adjust height and a level to check frequently.
The paver base should extend at least 12-18 inches beyond the fire pit walls on all sides. This creates a safe zone that prevents grass or other combustible materials from being too close to the fire.
Step 4: Building the Fire Pit Walls
Place your first course of fire bricks in a square pattern, leaving no gaps between bricks. Fire bricks are essential because they’re designed to withstand extreme temperatures without cracking or exploding. Regular masonry bricks can be dangerous when exposed to high heat.
For the second and subsequent courses, use a staggered pattern where the joints of upper courses don’t align with those below. This creates a stronger, more stable wall structure. Depending on your design preference, 2-3 courses typically provide the ideal height for safety and functionality.
Step 5: Finishing Touches
If using mortar, apply it sparingly between courses – fire pits need some airflow, and excessive mortar can trap moisture that expands when heated. Many builders prefer dry-stacking fire bricks, as this allows for natural expansion and contraction.
Create proper drainage by ensuring water can escape from the fire pit interior. Some builders add a few inches of gravel or sand to the bottom of the fire pit before first use.
Safety Considerations and Best Practices
Safety should be your top priority throughout construction and use. Install your fire pit on level ground away from overhanging branches, wooden structures, and property lines. Always have water or a fire extinguisher nearby when using your fire pit.
Use only seasoned hardwoods for fuel – avoid treated lumber, painted wood, or materials that can release toxic fumes. Keep the fire manageable and never leave it unattended. Allow ashes to cool completely before disposal.
Consider local fire restrictions and seasonal burn bans. Many areas prohibit outdoor fires during dry conditions or high wind warnings.
Maintenance and Longevity
Regular maintenance ensures your fire pit remains safe and attractive for years. After each use, remove ash and debris once completely cool. Inspect the fire bricks periodically for cracks or damage – replace any compromised bricks immediately.
Clean the surrounding pavers regularly to prevent staining from ash or debris. In freezing climates, ensure water doesn’t accumulate in the fire pit, as freeze-thaw cycles can damage the structure.
Enhancing Your Fire Pit Experience
Consider adding comfortable seating around your fire pit at a safe distance. Built-in benches, portable chairs, or stone seating walls can create an inviting gathering space. Outdoor lighting enhances safety and ambiance for evening use.
Storage solutions for firewood, fire-starting supplies, and safety equipment keep everything organized and accessible. A simple storage box or dedicated firewood rack near your fire pit adds both functionality and visual appeal.
Conclusion
Building a backyard fire pit is a rewarding DIY project that creates lasting memories and adds value to your property. With proper planning, quality materials, and attention to safety, your square fire pit will provide years of enjoyment for family gatherings, entertaining friends, and peaceful evening relaxation.
Remember that while this guide provides comprehensive instructions, local building codes and regulations may require modifications to these general guidelines. Always check with your local authorities before beginning construction, and consider consulting with a professional if you’re unsure about any aspect of the project.
The investment in time and materials pays dividends in the countless hours of enjoyment your new fire pit will provide. From casual weeknight fires to special celebrations, your handcrafted fire pit becomes a focal point for creating cherished memories with those you care about most.