The aroma of my Cheeseburger Pie baking takes me back to Sunday dinners at my grandmother’s house. She’d serve this hearty, comforting dish with a simple green salad, and the whole family would gather around her oak dining table, sharing stories until well after sunset. When I first started cooking on my own, this was one of the first recipes I asked her to teach me. Over the years, I’ve tweaked it slightly—adding a touch more Worcestershire sauce than she did and experimenting with different cheeses—but the heart of the recipe remains true to those cherished family meals.
Why I Love This Recipe
What makes this Cheeseburger Pie so special is its beautiful simplicity. It combines all the flavors we love in a good burger—savory beef, sharp cheese, sweet onions—but transforms them into something you can serve with a knife and fork. I’ve found it’s the perfect recipe for those evenings when you crave comfort food but don’t have the energy for anything complicated.
I’ve made this recipe countless times, and it never fails to bring smiles to my dinner table. My husband now requests it on chilly evenings, and when my sister’s children visit, they always ask if “Aunt Eliana will make the burger cake”—their adorable name for this family favorite.
What You’ll Need
Ground beef: 80/20 lean-to-fat ratio gives the best flavor; if you prefer leaner, 90/10 works but you might want to add a tablespoon of olive oil when cooking to maintain moisture
Onion: Yellow onions are my go-to for their sweet undertones when cooked; red onions work in a pinch but bring a stronger flavor
Garlic cloves: Fresh is best, but I’ve used pre-minced from my fridge many times with good results
Worcestershire sauce: The secret ingredient that gives that unmistakable burger flavor; there’s really no substitute, but soy sauce with a dash of vinegar comes close if you’re in a bind
Bisquick baking mix: Creates that magical self-forming crust; I’ve tested homemade alternatives (flour, baking powder, salt, and butter) when I’ve run out, and I’ll share that below
Milk: Whole milk creates the richest result, but I’ve used 2% successfully many times
Eggs: These bind everything together and help the topping rise
Cheddar cheese: Extra-sharp gives the most “cheeseburger” flavor, but my kids prefer medium cheddar for its milder profile
Let’s Get Cooking
Start With the Basics
Preheat your oven to 400°F. While it’s warming up, I like to get all my ingredients measured and ready—this recipe moves quickly once you start. Take a moment to grease a 9-inch pie plate. I prefer butter for flavor, but a quick spray of cooking oil works perfectly too.
Create the Savory Base
In a skillet over medium heat, cook the ground beef and chopped onion together. I’ve found this allows the onions to soften in the beef fat, developing a sweeter flavor than if you cook them separately. Once the meat begins to brown, add the minced garlic and Worcestershire sauce—adding garlic too early can make it bitter. Season with salt and pepper, then continue cooking until the beef is no longer pink and the onions are translucent and soft.
Here’s a little tip I learned the hard way: drain off the excess fat after cooking. The first time I made this on my own, I skipped this step and ended up with a soggy bottom. Now I carefully tilt the skillet and spoon off most of the drippings, leaving just enough for flavor.
Spread this mixture evenly in your prepared pie plate. I like to press it down slightly with the back of a spoon to create a level surface.
The Magic Happens
In a mixing bowl, whisk together the Bisquick, milk, and eggs until smooth. You’ll want to be thorough here—I aim for a pancake-batter consistency with no lumps. Pour this mixture evenly over your beef layer.
This is where the “impossible” part happens: during baking, the Bisquick mixture will settle and form a crust on the bottom while creating a tender, golden layer on top. It’s like kitchen magic every time!
Sprinkle your grated cheddar over everything. I’ve found that grating cheese yourself rather than using pre-shredded gives a better melt and flavor, but when I’m in a hurry, the bagged stuff works just fine.
The Final Touch
Bake your pie for 30-40 minutes. My oven runs hot, so I always check at the 25-minute mark. You’re looking for a golden-brown top and a center that’s set. I do the toothpick test just to be sure—it should come out clean when inserted near the center.
Let the pie rest for about 10 minutes before cutting. I know it’s tempting to dive right in (the smell is irresistible!), but this resting time helps the slices hold their shape better. I learned this the hard way after serving a delicious but messy first attempt to friends years ago!
Make It Your Own
Over the years of making this pie, I’ve created several variations that have become favorites in their own right:
Breakfast Cheeseburger Pie: Last summer when my in-laws visited, I added cooked and crumbled bacon to the beef mixture and used pepper jack cheese instead of cheddar. We had it for brunch with sliced avocado on top, and my father-in-law asked for the recipe before leaving!
Mushroom Swiss Version: When my vegetarian friend comes over, I sometimes make two pies—the regular version and one where I replace half the beef with finely chopped mushrooms and use Swiss cheese on top. The earthiness of the mushrooms with the nutty Swiss creates a completely different but equally delicious dish.
Taco Pie Twist: For my daughter’s birthday dinner last year, I switched up the seasonings with taco spices, added a can of drained black beans to the beef, and topped with a Mexican cheese blend. Served with sour cream and salsa, it became an instant hit with the teenagers.
My Best Tips
After making this pie probably a hundred times (no exaggeration!), here are some things I’ve learned:
• Let your skillet get properly hot before adding the beef—this gives you better browning and flavor development without steaming the meat.
• If you don’t have Bisquick, you can make your own by whisking together 1/2 cup flour, 3/4 teaspoon baking powder, a pinch of salt, and 1 tablespoon of cold butter cut into the dry ingredients until crumbly.
• The pie reheats beautifully the next day. I often make it on Sundays and portion the leftovers for quick weekday lunches. About 45 seconds in the microwave brings it back to life.
• For a lighter version that I started making after my annual check-up last year, use ground turkey and reduce the cheese to 2/3 cup. It’s still satisfying but cuts down on some of the richness.
Frequently Asked Questions
Can I make this ahead of time? → Absolutely! I often prepare the beef mixture the night before, refrigerate it, and then assemble and bake the next day. Just add about 5 minutes to the baking time if the beef mixture is cold from the refrigerator.
What sides go well with Cheeseburger Pie? → We love it with a simple green salad dressed with vinaigrette. The freshness balances the richness perfectly. In summer, sliced garden tomatoes with a little salt and olive oil make a perfect accompaniment.
My pie seems too wet. What went wrong? → This usually happens if the beef mixture has too much liquid. Make sure to drain it well after cooking, and if your onions released a lot of moisture, you might want to cook the mixture an extra minute or two to evaporate excess liquid.
Can I freeze this? → Yes! I often make two and freeze one. Cool it completely, wrap tightly in foil, and freeze for up to 3 months. Thaw overnight in the refrigerator before reheating at 350°F until warmed through (about 20-25 minutes).
Can I use a different baking mix? → Any biscuit-style baking mix will work. I’ve tried several store brands with nearly identical results. The key is maintaining the same ratio of mix to liquid.
This Cheeseburger Pie has been a faithful companion through busy weeknights, casual gatherings, and those evenings when only comfort food will do. I hope it brings the same warmth and satisfaction to your table that it has to mine for all these years.
Print
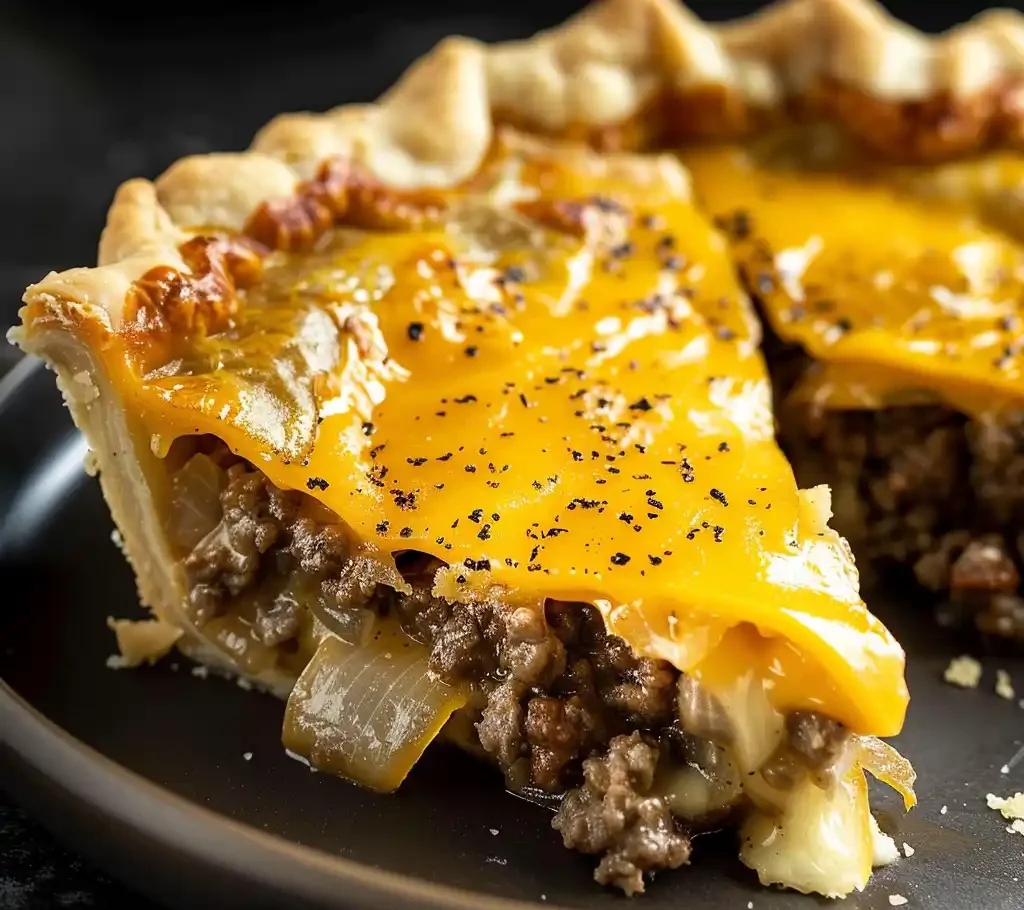
Old-Fashioned Impossible Cheeseburger Pie
A nostalgic comfort food classic that combines savory ground beef with a magically rising Bisquick crust and melty cheese topping – perfect for busy weeknights when you crave the flavors of a cheeseburger in an easy-to-serve pie format.
- Total Time: 65 minutes
- Yield: 6 servings 1x
Ingredients
For the Beef Filling:
- 1 lb ground beef (80/20 preferred)
- 1 large onion, chopped
- 2 garlic cloves, minced
- 1 tablespoon Worcestershire sauce
- 1 teaspoon salt
- ½ teaspoon black pepper
For the Crust:
- ½ cup Bisquick baking mix
- 1 cup whole milk
- 2 large eggs
- For the Topping:
- 1 cup extra-sharp cheddar cheese, grated
Instructions
- Preheat and Prepare the Dish: Preheat your oven to 400°F (200°C). Grease a 9-inch pie plate with butter or nonstick spray to ensure your cheeseburger pie doesn’t stick after baking. This preparation step is crucial for easy serving later.
- Cook the Beef Filling: In a skillet over medium heat, combine ground beef, chopped onion, minced garlic, Worcestershire sauce, salt, and pepper. Cook until the meat is completely browned and the onions have become tender and translucent, about 10 minutes. Carefully drain off any excess fat to prevent the pie from becoming greasy. Transfer the cooked beef mixture into the greased pie plate, spreading it into an even layer.
- Prepare the Crust Batter: In a mixing bowl, combine the Bisquick mix, milk, and eggs. Whisk thoroughly until the mixture is smooth and free of lumps. This batter will form the magical crust that rises during baking. Pour this batter evenly over the beef mixture, ensuring it covers all the meat while being careful not to overflow the dish.
- Add Cheese and Bake: Sprinkle the grated sharp cheddar cheese evenly over the top of the batter. Place the pie in the preheated oven and bake for 30-40 minutes. You’ll know it’s done when the center is set and no longer jiggly, the top has turned a beautiful golden brown, and a toothpick inserted near the center comes out clean.
- Let It Rest and Serve: Once you’ve removed the pie from the oven, allow it to rest for 10 minutes. This crucial resting period helps the pie set properly and makes slicing much easier. Cut into wedges and serve warm, accompanied by a side salad, coleslaw, or a simple tomato slice to round out the meal.
Notes
- For a healthier version, you can use lean ground beef or ground turkey.
- Add diced bell peppers or mushrooms to the beef mixture for extra vegetables.
- Try adding classic burger toppings like diced pickles, tomatoes, or even bacon bits to the meat mixture.
- This pie reheats beautifully, making it perfect for leftovers.
- For a homemade alternative to Bisquick, combine 1/2 cup flour, 3/4 teaspoon baking powder, 1/8 teaspoon salt, and 1 tablespoon butter.
- Prep Time: 15 minutes
- Cook Time: 40 minutes
- Category: Main-course
- Method: Baking
- Cuisine: American
Nutrition
- Serving Size: 1 slice
- Calories: 380
- Sugar: 4g
- Sodium: 750mg
- Fat: 25g
- Saturated Fat: 12g
- Unsaturated Fat: 10g
- Trans Fat: 0g
- Carbohydrates: 14g
- Fiber: 1g
- Protein: 24g
- Cholesterol: 140mg