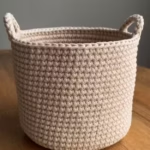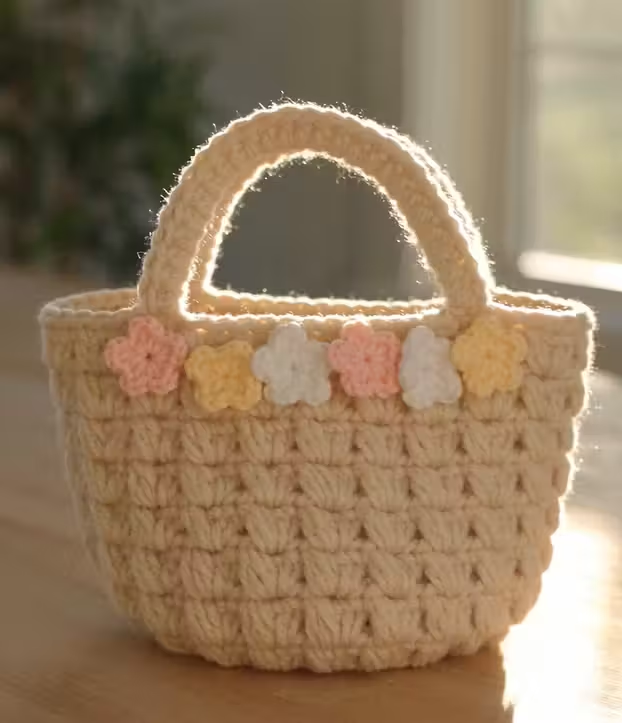
A little basket made from yarn can be surprisingly charming. Add a handful of crochet flowers, and suddenly you have a handmade decoration that feels perfect for a cozy shelf, bedside table, craft room, or even a small gift.
This crochet flower basket is a beginner-friendly project with a simple basket shape and an extra decorative touch that makes it look much more special than a basic crochet basket.
The best part is that you can easily change the colors to match your home or the person you are making it for. Soft cream yarn with pastel flowers gives it a delicate look, while brighter flowers can turn it into a cheerful spring or summer decoration.
If you are comfortable with basic crochet stitches, this is a fun project to work on while watching a show or relaxing at home.
Why You’ll Love This Crochet Flower Basket
There are plenty of reasons to add this project to your crochet list.
It is practical.
The finished basket can hold small accessories, craft supplies, hair accessories, jewelry, keys, or other little items that tend to collect on tables.
It is customizable.
You can make the basket in one color or combine several shades of yarn. The flowers can also be changed to whatever colors you already have in your stash.
It makes a thoughtful handmade gift.
Fill the finished basket with chocolates, small beauty products, handmade soaps, or another little gift for a personal presentation.
It does not require complicated shaping.
The basket is built from a simple base and worked upward, making it much easier to follow than projects with complicated three-dimensional shaping.
It is perfect for leftover yarn.
The flowers are small, so they are a great way to use up those little amounts of yarn that are too small for a larger project.
Materials You’ll Need
Before starting, gather everything you need so you can work without stopping halfway through.
Yarn
For the basket, choose a sturdy worsted-weight or medium-weight yarn.
A cotton or cotton-blend yarn is particularly nice because it gives the basket enough structure while still being pleasant to crochet.
For the example shown here, use:
- Cream or off-white yarn for the basket
- Pink yarn for the flowers
- White yarn for additional flowers
- Yellow yarn for flower centers
- Small amounts of green yarn for leaves, if desired
You do not need a large amount of yarn for the flowers, which makes this project useful for using up leftovers.
Crochet Hook
Use a crochet hook appropriate for the yarn you choose. For medium-weight yarn, a hook around 5 mm is a good starting point.
If your stitches are very loose, try a slightly smaller hook. A tighter fabric will generally make a more stable basket.
Other Supplies
You will also need:
- Yarn needle
- Scissors
- Stitch marker
- Measuring tape
- Optional: a small piece of cardboard for shaping the base
- Optional: fabric lining if you want a more finished interior
Crochet Abbreviations
This pattern uses common US crochet terminology.
- ch – chain
- sl st – slip stitch
- sc – single crochet
- hdc – half double crochet
- dc – double crochet
- st – stitch
- sts – stitches
- rep – repeat
Choosing the Right Yarn
The yarn you choose can completely change the personality of your basket.
For a soft cottage-style look, cream, beige, blush pink, dusty rose, sage, and light yellow work beautifully together.
For something brighter, try coral, turquoise, lavender, sunny yellow, or bright pink.
If you want your basket to hold heavier objects, choose a cotton yarn or a slightly thicker yarn. Very soft acrylic yarn can work, but the basket may be more flexible.
One useful trick is to crochet with a slightly smaller hook than you would normally use for that yarn. This creates tighter stitches and helps the basket stand up better.
Step 1: Crochet the Basket Base
Begin with a magic ring or chain a few stitches and join them into a small circle.
Work single crochet stitches around the center, increasing evenly around the round.
The goal is to create a flat circular base.
Do not worry if your first few rounds look slightly wavy. As you continue increasing, the shape should become more even.
Keep checking your base against the size you want.
For a small decorative basket, a base around 4–5 inches wide works well. If you want a larger storage basket, simply continue adding increase rounds.
Helpful tip
Place a stitch marker at the beginning of each round. This makes it much easier to keep track of where each round begins, especially when working in continuous rounds.
Step 2: Build the Basket Sides
Once your base reaches the desired width, stop increasing.
Continue working single crochet around without adding extra stitches.
This is what causes the crochet to turn upward and create the sides of the basket.
Work several rounds until the basket reaches your preferred height.
For a small flower basket, approximately 3–4 inches of height gives a cute proportion.
If you want a deeper storage basket, simply add more rounds.
Watch your tension
Try to keep your tension consistent as you work upward.
If your stitches suddenly become much looser, the sides may start leaning outward. A slightly tighter stitch will help the basket maintain its shape.
Step 3: Add a Simple Decorative Edge
Once the basket reaches the desired height, you can finish it with a simple decorative border.
One easy option is to work one round of single crochet followed by a final round of slip stitches.
Another option is a small scalloped edge.
For a very clean and modern look, however, a simple single-crochet border is enough.
Fasten off and leave a small yarn tail for weaving in.
Use your yarn needle to carefully hide the loose end inside the stitches.
Step 4: Make the Crochet Flowers
Now comes the fun part.
The flowers are what transform the basket from a simple crochet container into a decorative piece.
For a basic five-petal flower, begin with a small center ring.
Work several stitches into the center, then create each petal using a combination of chain stitches and taller stitches.
A simple flower can be made in only a few rounds, so do not worry about making every flower identical.
In fact, slightly different flowers can make the finished basket look more handmade.
Make flowers in different sizes
Try making:
- Small flowers
- Medium flowers
- One or two larger statement flowers
This creates more visual interest when they are arranged on the basket.
Step 5: Add the Flower Centers
For the center of each flower, use a contrasting yarn color.
Yellow is an easy classic choice, but you could also use:
- White
- Cream
- Orange
- Brown
- Light green
A contrasting center helps the petals stand out.
You can also add a tiny embroidered center instead of crocheting one.
Step 6: Add Small Crochet Leaves
Leaves are optional, but they can make the flower arrangement look much fuller.
Using green yarn, crochet a few small leaf shapes.
You do not need many.
A few leaves placed between the flowers are enough to create the appearance of a small floral arrangement.
If you prefer a minimalist basket, skip the leaves completely and use flowers alone.
Step 7: Arrange Everything Before Sewing
This is an important step.
Do not immediately sew the flowers onto the basket.
Instead, place all the flowers and leaves on the basket first.
Move them around until you like the arrangement.
Try placing larger flowers toward the center and smaller ones around them.
You can also create a slightly asymmetrical arrangement. Handmade decorations often look more natural when everything isn’t perfectly centered.
Take a quick photo of your arrangement before removing the pieces. That way, you have a reference when you start attaching everything.
Step 8: Attach the Flowers
Thread a yarn needle with matching yarn and carefully sew each flower onto the basket.
Stitch through the center of the flower and into the basket fabric.
Make several small stitches rather than one large stitch.
This keeps the flowers securely attached while making the stitching less noticeable.
For leaves, sew along the center or base of each leaf.
Take your time with this part because loose flowers can quickly become annoying if they are not securely attached.
Step 9: Shape Your Finished Basket
Once everything is attached, gently shape the basket with your hands.
If the sides are slightly uneven, lightly stretch them into place.
You can also place a small container inside the basket temporarily while it rests. This can help encourage the sides to hold a nice shape.
Avoid soaking the basket unless the yarn manufacturer’s care instructions recommend washing and blocking it.
Easy Ways to Customize It
One of the best things about this project is how easy it is to make it your own.
Make a neutral version
Use:
- Cream basket
- Beige flowers
- White flowers
- Soft green leaves
This creates a calm, farmhouse-inspired look.
Make a colorful version
Try:
- Pink
- Yellow
- Lavender
- Blue
- Coral
A colorful basket would look especially cute in a child’s room or craft space.
Create a holiday version
Change the flowers and colors depending on the season.
For spring, use pastel flowers.
For summer, use bright colors.
For autumn, use mustard, rust, cream, and brown.
For winter, use white, red, deep green, and cream.
What Can You Put Inside the Basket?
Although this project is decorative, the basket can also be useful around the house.
Use it to store:
- Crochet hooks
- Yarn needles
- Hair accessories
- Scrunchies
- Jewelry
- Keys
- Small cosmetics
- Office supplies
- Sewing supplies
- Remote controls
- Small toys
It can also make a beautiful gift basket.
Fill it with a few small treats and give the entire basket as part of the present.
Beginner Tips for a Better Result
Keep your stitches tight
A tight fabric gives the basket more structure.
Count your stitches
If the basket starts becoming uneven, you may have accidentally added or skipped stitches.
Use a stitch marker
This makes working in continuous rounds much easier.
Hide your yarn ends carefully
Loose yarn tails can make an otherwise beautiful project look unfinished.
Do not rush the flowers
The flowers are the decorative focal point, so spend a little extra time arranging them.
Take a step back
When arranging the flowers, look at the basket from a distance. Something that looks perfect close up may look unbalanced when viewed from across the room.
Common Problems and How to Fix Them
Why is my basket curling?
Your base may not have enough increases.
If the circular base begins curling upward before you want the sides to start, add another increase round.
Why are my basket sides floppy?
Your stitches may be too loose or your yarn may be too soft.
Try a smaller crochet hook or choose a sturdier cotton yarn.
Why is my basket getting wider?
You may accidentally be adding stitches during the side rounds.
Once the base reaches the desired size, stop increasing.
Why don’t my flowers sit flat?
Check your tension and make sure you are not pulling the center too tightly when sewing the flower onto the basket.
Make It Your Own
The beauty of handmade crochet is that your finished project does not need to look exactly like someone else’s.
Change the yarn.
Change the flowers.
Make the basket taller.
Make it smaller.
Add leaves.
Leave the flowers off.
Create a completely different color palette.
Every small change gives the project a different personality.
And because the basket itself is relatively simple, it is a great project for experimenting with color combinations and decorative details without committing to a huge crochet project.
Final Thoughts
This crochet flower basket is one of those projects that looks complicated once it is finished, but the basic construction is actually quite approachable.
The basket starts with a simple crocheted base, develops upward into the sides, and then gets its personality from the handmade flowers.
That combination makes it both useful and decorative.
Whether you make one for yourself, create a set for your home, or turn it into a handmade gift, it is a lovely way to spend a quiet afternoon with your favorite yarn.
And remember, your basket does not have to be perfect. Slight variations in the flowers, stitches, and arrangement are part of what makes handmade crochet feel special.
Grab your yarn, choose your favorite flower colors, and start creating your own little crochet nest.
Crochet Flower Basket at a Glance
Skill Level: Beginner to intermediate
Project Type: Home decor / storage
Main Stitch: Single crochet
Yarn: Medium-weight cotton or cotton-blend
Hook: Approximately 5 mm, adjusted to your tension
Finished Size: Approximately 4–5 inches wide and 3–4 inches tall, depending on your yarn and number of rounds
Best For: Home decor, gifts, craft storage, and scrap-yarn projects