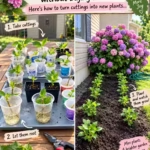
While most gardeners are familiar with taking stem cuttings, many are surprised to learn that you can grow entirely new plants from the roots themselves. Root propagation is a powerful technique for multiplying perennials like poppies, phlox, and horseradish. By using homemade, natural rooting solutions, you can ensure these cuttings take hold without the need for synthetic chemicals.
Here is how to master the art of root cuttings using ingredients found in your kitchen and backyard.
1. Why Choose Root Cuttings?
Root cuttings are often more successful for specific plants that have thick, fleshy roots. Because roots are designed to store energy, they contain a “blueprint” of the plant and enough nutrients to push out new shoots even without leaves. The best time to take these cuttings is during the dormant season (late autumn to early spring) when the plant’s energy is concentrated underground.
2. Selecting and Preparing the Roots
To start, carefully dig around the base of a mature “parent” plant and find a healthy, firm root about the thickness of a pencil.
The “Direction” Trick: To avoid planting the root upside down, gardeners use a specific cutting style. Cut the top of the root (the end closest to the plant stem) straight across. Cut the bottom end (the end that was deepest in the soil) at a sharp angle.
The Size: Each cutting should be roughly 2 to 4 inches long.
3. Homemade Natural Rooting Solutions
Before planting, you can significantly increase your success rate by dipping your cuttings into a homemade “booster.” Here are three of the most effective natural options:
Willow Water (The Gold Standard): Willow trees are rich in salicylic acid and indolebutyric acid, both of which stimulate root growth. To make it, chop up young green willow twigs and soak them in boiling water for 24 hours. Soak your root cuttings in this liquid for a few hours before planting.
Honey and Cinnamon: Honey is a natural antiseptic that prevents rot, while cinnamon is a powerful fungicide. Dip the angled end of your root cutting into honey and then lightly dust it with cinnamon. This “seals” the wound and protects it from soil-borne diseases.
Aloe Vera Gel: If you have an aloe plant, the fresh gel contains salicylic acid and enzymes that trigger cell division. Simply rub the fresh gel onto the cut ends of your roots to provide a concentrated burst of growth hormones.
4. Planting for Success
Once your roots are prepped and “boosted,” it is time to get them into the soil.
Vertical Planting: For thick roots, bury them vertically in a pot of sandy compost with the straight-cut end just level with the soil surface. Cover with a thin layer of grit or sand.
Horizontal Planting: For thinner roots (like those of a Phlox), lay them horizontally on the surface of the soil and cover them with about half an inch of compost.
5. The Waiting Game
Place your pots in a cool but frost-free area, such as a cold frame or a bright windowsill away from direct heat. Root cuttings take longer to “wake up” than stem cuttings; you may not see green shoots for several weeks. Once the shoots appear and have a few leaves, they are ready to be moved into individual pots.
The “Patience” Principle
The biggest mistake gardeners make with root cuttings is checking them too often. Every time you “tug” on a cutting to see if it has rooted, you break the microscopic hairs that are trying to establish themselves. If you see new green growth on the surface, the roots are doing their job—leave them alone until they are strong enough to transplant!