Every spring, garden centers tempt you with those gorgeous potted hydrangeas—massive blooms in dreamy blues, romantic pinks, pristine whites. The price tags, though? They sting. Forty, fifty, sometimes seventy dollars for a single plant that might not even survive transplant shock.
Meanwhile, that established hydrangea already thriving in your yard contains everything you need to create an entire hedge of identical plants. For free. In a few weeks. With minimal effort.
Propagating hydrangeas from cuttings isn’t some advanced technique reserved for professional nurserymen. It’s embarrassingly simple, remarkably reliable, and delivers that rare gardening satisfaction of creating something from almost nothing. Once you’ve successfully rooted your first cutting, you’ll never look at garden center prices the same way.
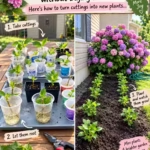
Here’s how to turn one hydrangea into many.
Why This Method Beats Buying Plants
Financial sense: One established hydrangea becomes dozens of new plants at zero cost beyond a bag of potting mix.
Genetic certainty: Cuttings create clones of the parent plant—same bloom color, same growth habit, same cold hardiness. No surprises.
Timing control: Propagate when it suits your schedule, not when garden centers happen to stock hydrangeas.
Superior establishment: Plants you’ve grown from cuttings often establish faster than nursery plants suffering transplant trauma.
Sharing economy: Excess rooted cuttings make fantastic gifts or trading material with other gardeners.
Timing Your Propagation Window
The sweet spot for taking hydrangea cuttings falls in that productive period between spring’s initial growth flush and summer’s peak bloom production—typically late May through early July in most climates.
You’re looking for stems in that ideal middle stage: past the brittle softness of brand-new growth but not yet the woody stiffness of mature stems. Gardeners call these “softwood cuttings”—stems flexible enough to bend without snapping, but firm enough to hold their shape.
Critical detail: Select non-flowering stems. Once a stem commits energy to producing blooms, it becomes far less interested in developing roots. Look for vigorous green shoots that show no signs of forming flower buds.
Morning advantage: Take cuttings early in the day when plants are fully hydrated from overnight. Afternoon cuttings are stressed and dehydrated before you even begin.
Essential Supplies Checklist
Sharp, sterilized pruning shears: Dull or dirty blades crush stems and introduce pathogens
Small containers with drainage: 4-inch pots work perfectly
Rooting medium: Either straight perlite, perlite-peat blend, or quality seed-starting mix
Rooting hormone: Optional but significantly improves success rates
Humidity enclosure: Clear plastic bags, plastic domes, or even inverted mason jars
Wooden skewers or stakes: To keep plastic off foliage
The Propagation Process Decoded
Phase 1: Selecting and Preparing Cuttings
Identify healthy stems measuring 4-6 inches long with at least three sets of leaves (called “nodes”—the bumpy points where leaves attach to stems). These nodes contain dormant growth cells that transform into roots.
Make your cut just below a node using sterilized shears. The cut should be clean and slightly angled to maximize surface area for rooting.
Strip away the bottom two sets of leaves, leaving only the top set or two. This reduces moisture loss through transpiration while maintaining some photosynthetic capacity. If remaining leaves are large, cut them in half horizontally—this further reduces water stress.
Phase 2: Rooting Hormone Application
While not absolutely required, rooting hormone powder or gel dramatically improves both the percentage of successful cuttings and rooting speed.
Moisten the cutting’s base, dip it in hormone powder (tap off excess), and proceed immediately to planting. The hormone contains synthetic auxins that trigger root cell development.
Phase 3: Planting and Environment Creation
Fill containers with pre-moistened rooting medium. Create a planting hole with a pencil or stick (never push the cutting directly into medium—this scrapes off the rooting hormone).
Insert each cutting about 2 inches deep, then firm the medium gently around it.
Here’s where most people go wrong: creating proper humidity. Cuttings have no roots to replace water lost through leaves, so they’ll quickly desiccate without humid air.
Cover the entire container with a clear plastic bag, using skewers or stakes to prevent plastic from touching foliage (contact points create condensation that encourages fungal disease). Alternatively, use a clear plastic humidity dome if you have one.
Phase 4: Environmental Management
Position containers in bright, indirect light—a north-facing window or shaded outdoor location works well. Direct sun overheats the enclosed environment and cooks your cuttings.
Ideal temperature range: 65-75°F. Too cool slows rooting; too hot promotes rot.
Keep the rooting medium consistently moist but never waterlogged. Check every few days and mist if the medium feels dry. Remove condensation buildup from plastic covers to prevent fungal issues.
Monitoring Root Development
Patience becomes the hardest part here. You’ll see nothing happening on the surface while, underground, root formation either succeeds or fails.
Timeline expectations: Most hydrangea varieties show root development within 2-4 weeks. Bigleaf and smooth hydrangeas root quickest; panicle and oakleaf types take longer.
Testing for roots: After three weeks, gently tug on the cutting. Resistance indicates roots anchoring it to the medium. If it lifts freely, give it more time.
Visual confirmation: New leaf growth signals successful rooting. Once you see fresh leaves emerging, roots have definitely established.
Transitioning to Independence
Once cuttings develop a healthy root system (visible through drainage holes or 2-3 inches long when checked), begin the hardening-off process:
Week 1: Remove humidity covers for increasing periods daily—start with an hour, work up to all day.
Week 2: Transplant into larger containers (6-inch pots) with quality potting soil. Continue growing in protected conditions.
Weeks 3-4: Gradually expose plants to outdoor conditions if temperatures allow—increasing time outside daily.
Long-term plan: Keep new plants in containers through their first full season, transplanting to permanent garden locations the following spring. This gives root systems time to develop strength before facing winter stress.
Maximizing Success Rates
Take multiple cuttings: Even under ideal conditions, expect 60-80% success rates. Propagate more than you need to account for failures.
Sterilize everything: Disease-free tools and containers prevent the fungal and bacterial issues that kill cuttings.
Size matters: Trim oversized leaves that demand more water than rootless cuttings can provide.
Patience pays: Resist the urge to constantly check progress. Unnecessary disturbance damages forming roots.
Variety-Specific Considerations
Bigleaf hydrangeas (H. macrophylla): The easiest to propagate—perfect for beginners. These root eagerly and forgive mistakes.
Smooth hydrangeas (H. arborescens): Nearly foolproof. ‘Annabelle’ particularly roots with almost 100% success under basic conditions.
Panicle hydrangeas (H. paniculata): Require warmer conditions and higher humidity. Give these extra time and don’t panic if rooting takes six weeks.
Oakleaf hydrangeas (H. quercifolia): The slowest rooters but worth the wait. These magnificent natives eventually develop into spectacular specimens.
The Economic Reality
A single mature hydrangea can provide 20+ viable cuttings in a season without affecting its health or appearance. At even 70% success rate, that’s 14 new plants.
At $50 per potted hydrangea (conservative estimate), you’ve just created $700 worth of plants using a few dollars of potting medium and rooting hormone.
That economic argument becomes even more compelling when you’re planting hedges, creating privacy screens, or landscaping large properties. Professional quantities of hydrangeas suddenly become accessible on any budget.
The Deeper Satisfaction
Beyond the financial benefits lies something more valuable: the confidence and connection that comes from truly understanding how plants work. You’re not just following instructions—you’re manipulating plant biology to achieve specific outcomes.
That first moment when you tug gently on a cutting and feel roots resisting? That’s when you realize you’ve legitimately created a plant from a fragment. The satisfaction is disproportionate to the actual difficulty involved.
Master hydrangea propagation, and you’ll start seeing every mature shrub as potential raw material. That expensive specimen at the botanical garden? You could grow it from a cutting. Your neighbor’s stunning blue hydrangea? One gifted cutting away from filling your yard.
The garden center’s power over you diminishes substantially once you understand propagation. And that might be the most valuable outcome of all.